I’ve worked with several methods & software packages over the years, but there is now a very easy, very fast way to generate really nice mesh data from photos. It involves 2 easy to use packages and a 3d package depending upon what you have. First off – the software:
VisualSFM which will do the point cloud extrapolation from your photos. http://ccwu.me/vsfm/
CMVS – adds to the VisualSFM and allows you to rebuild your point-cloud into a pseudo dense mesh. https://github.com/pmoulon/CMVS-PMVS Note: Click on the Clone or download from GitHub, then in the zip file open “BinariesWIn-Linux / Win64-VS2010” Then copy all the files in there and paste them in the same folder as Visual SFM
Meshlab – this app will let you bring in the mesh file, reduce it’s vert noise, build a contiguous mesh from the point cloud, build a single texture map from the various camera shots and export the mesh into a standardized format. http://www.meshlab.net/
3D app – Blender, 3DS Max, Maya, or whatever you use.
Basic workflow – a cell phone will work great for this, a DSLR, obviously, will be even better. I did my tests with a cell phone. I set the camera in “pro” mode where I locked the white balance, aperture & shutter speed down in manual mode so there wasn’t any auto-exposure occurring. Then take anywhere from 35 to 75+ shots of your target object. I did a test with the rough bark of a Douglas Fir tree. The key is to try to bracket your object with shots – putting an imaginary grid in the air and taking a shot from each square. With an object on the ground, you slowly step around it taking multiple shots as you go trying to maintain a steady distance and offset each time.
Once you have the shots, dump them all into a folder and open up VisualSFM. You then Click on Compute missing matches, which will look at all your images, then doing comparisons between images and figuring out the point cloud vert locations. You’ll then Compute 3D Reconstructions to build the 3D point cloud from the images.
After that, you will load the file up in Meshlab and convert it from a point cloud into 3D geometry.
This is a great tutorial on how to go through the process: https://www.youtube.com/watch?v=D6eqW6yk5
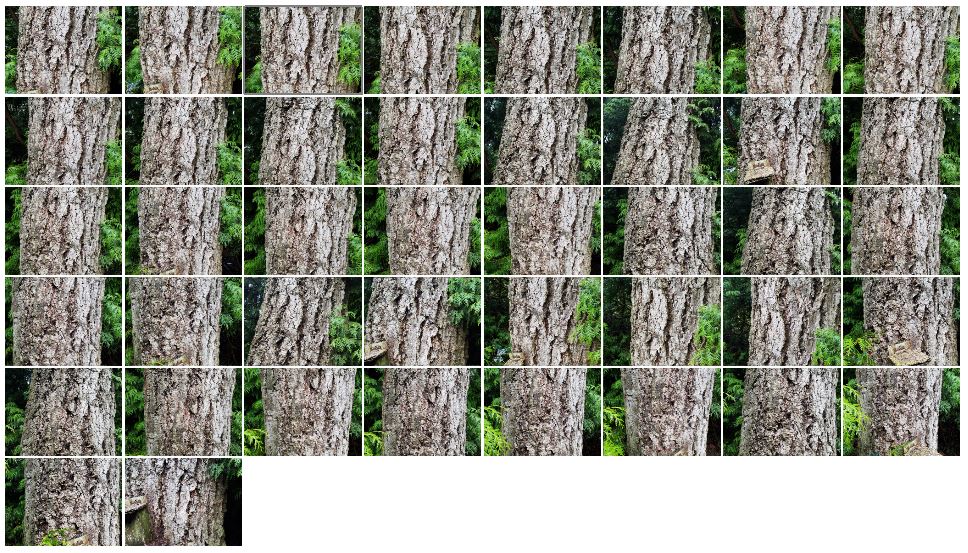
This is the set of images from the bark of a Douglas Fir tree.
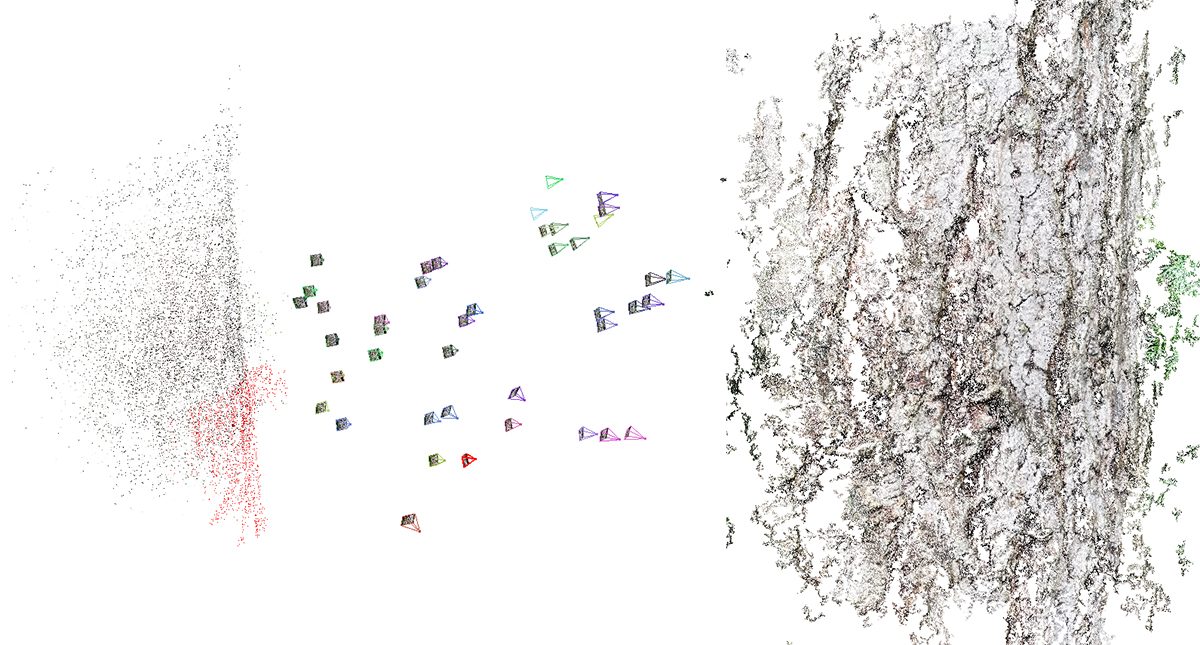
The point cloud with the points & photo locations on the left, and the dense 3D cloud closeup on the right.
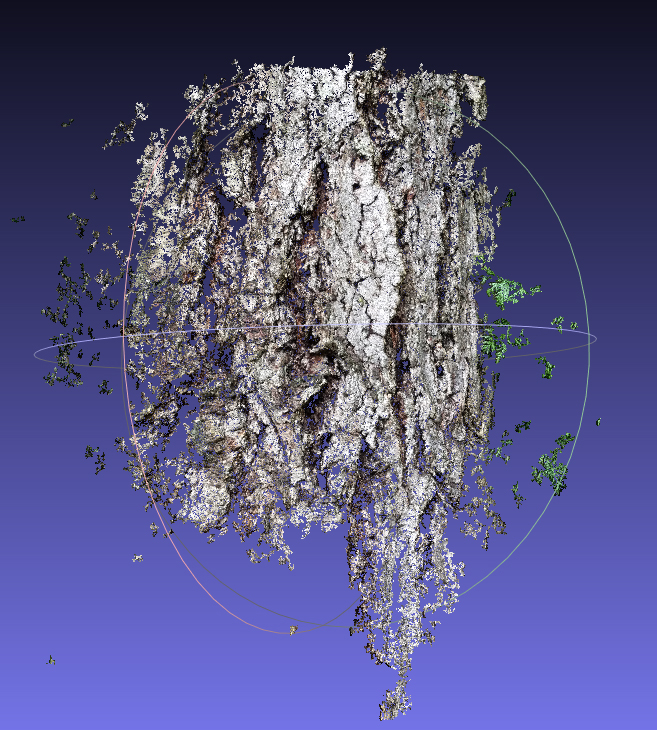
Here’s the point cloud prior to converting into geometry in MeshLab.
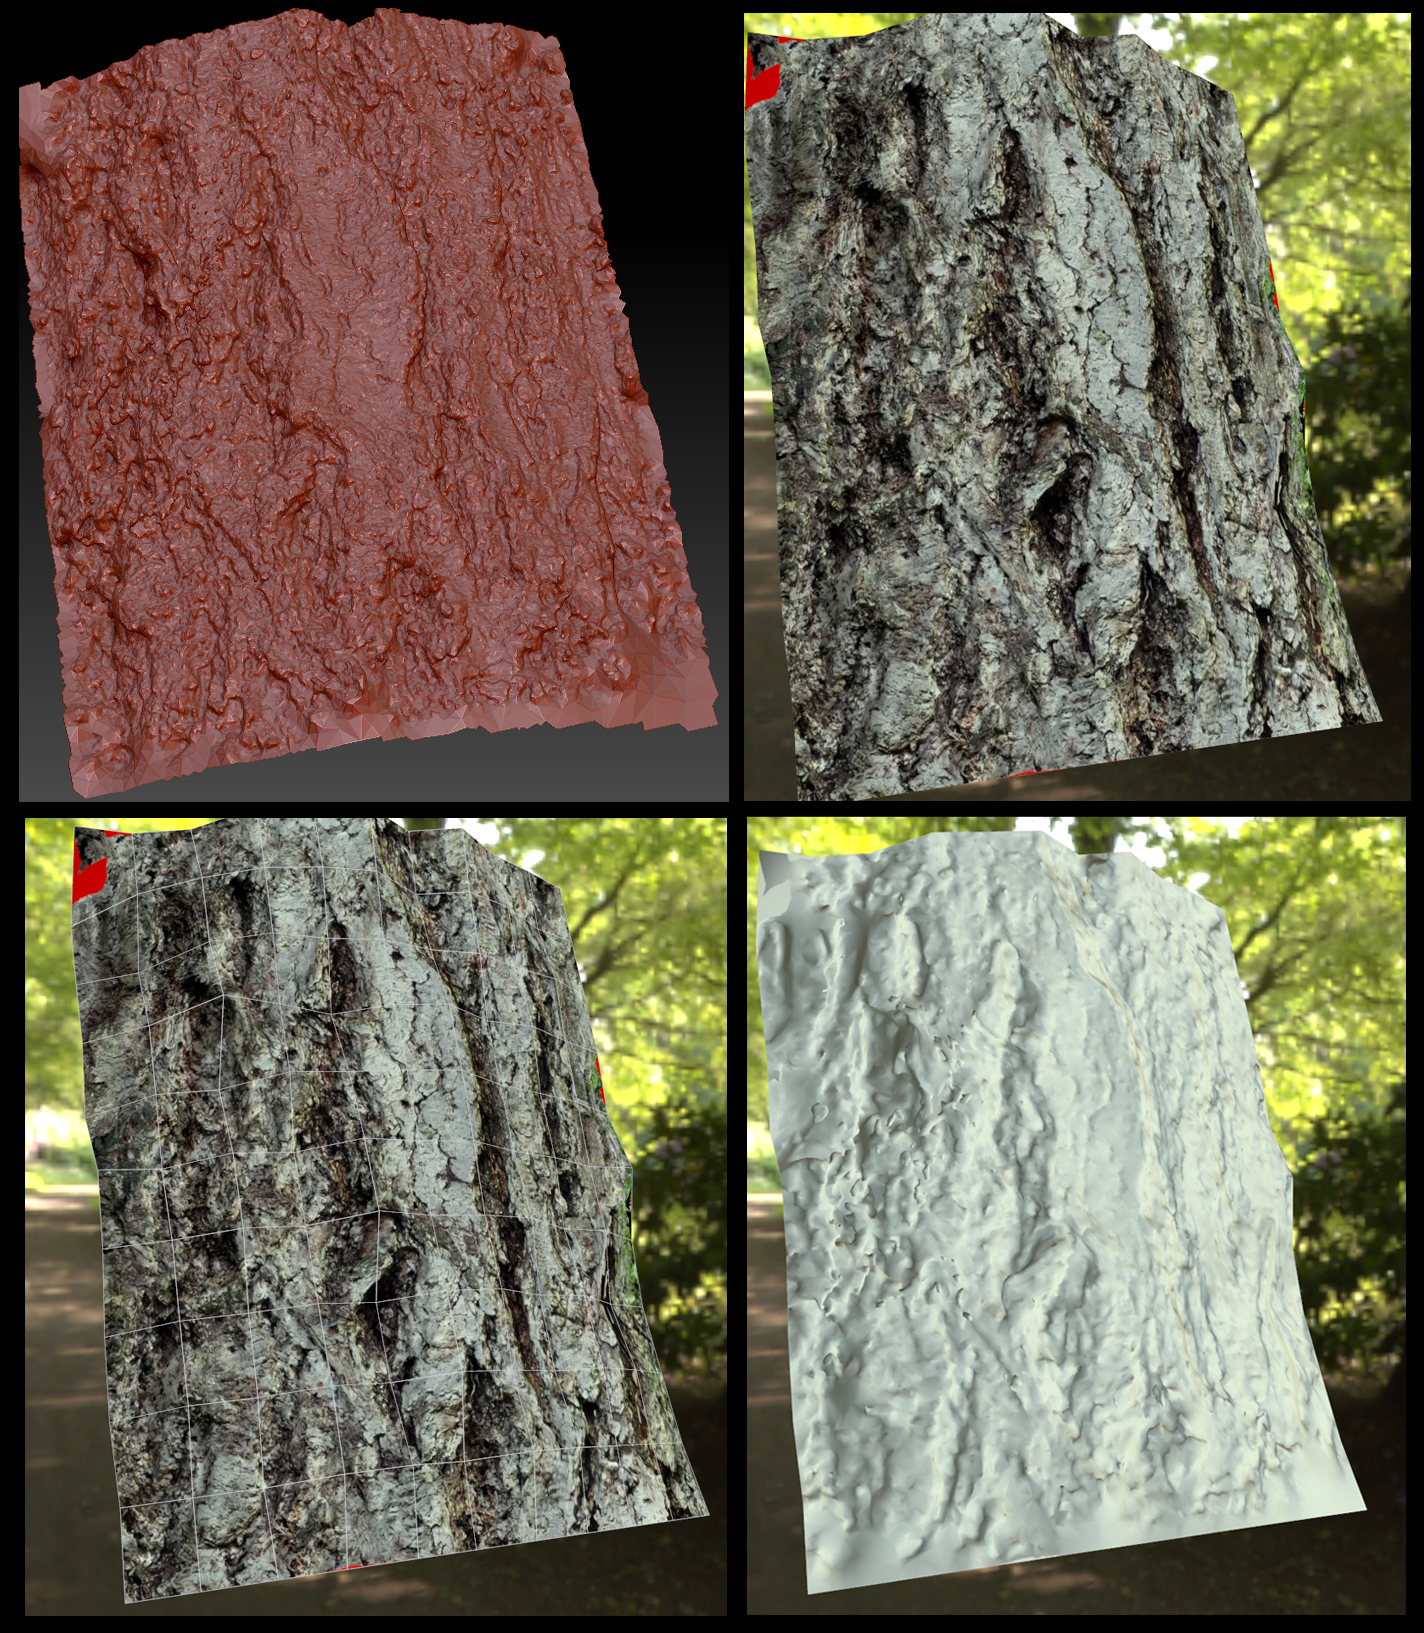
Top left image is in Zbrush where you can see the fidelity obtained from the point cloud. Approximate poly count is 1.4 million polygons. The other images are of a low polygon (200 triangle) mesh that was created in 3DS Max, then a projection modifier along with Render to Texture was used to create the low poly version with matching texture as well as an extracted normal map. These were set up and captured in Marmoset Toolbag showing the result in a low-poly workflow.
