![]()
-
Recent Posts
Shaders & Materials
Zbrush
Research
Concept
3D Printing
![]()
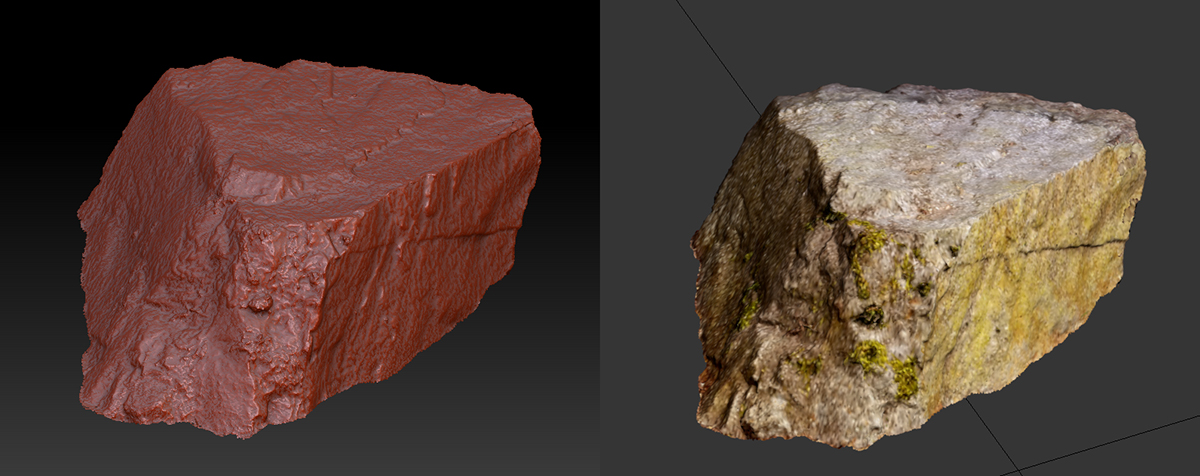
Agisoft Photoscan is a professional level app. that does the photo evaluation, point extrapolation and mesh building from a point cloud. It has a very inclusive matching algorithm. I took a series of shots of a rock which had a very dark side due to my camera exposure settings. I reset the exposure levels and took additional shots of the shadowed area so that I could capture the detail and the software was able to match those with my previous set. This is definitely a step up from the freeware software such as VisualSFM. Agisoft also has quality settings for the point extrapolation. The cost of that is time – on a high setting, it took approximately 25 min. to build the dense point cloud for the rock shown below. The other consideration for this software is price – at a cool $3,499, it’s not for the casual user.
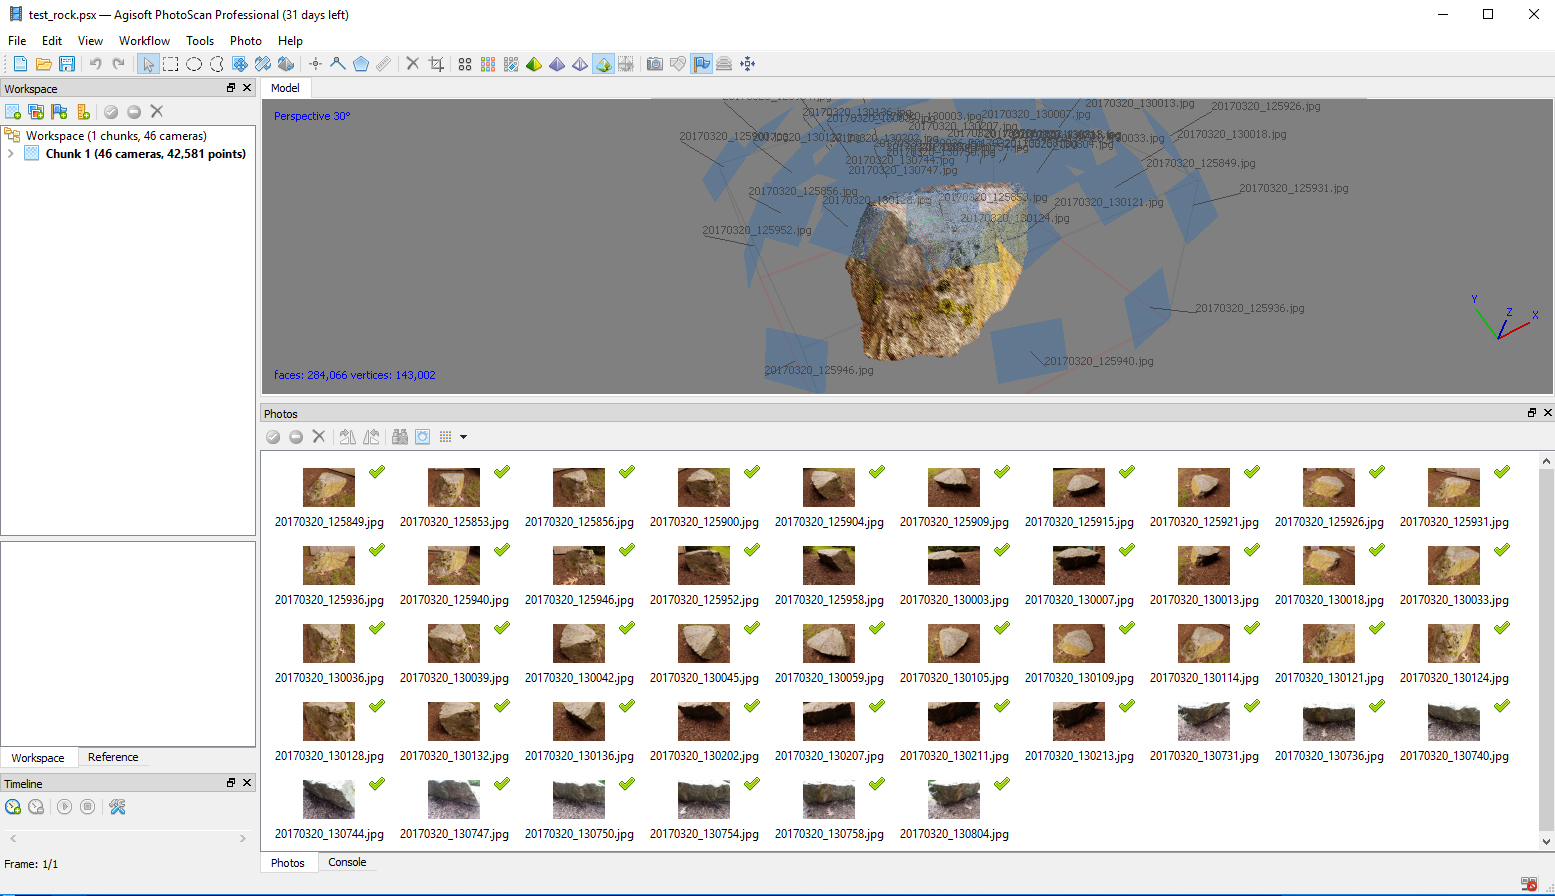
A rock generated from 2 sets of photo source with different exposure settings.
The rock object file dropped into Zbrush and also in 3DS Max with the default texture applied.
I’ve worked with several methods & software packages over the years, but there is now a very easy, very fast way to generate really nice mesh data from photos. It involves 2 easy to use packages and a 3d package depending upon what you have. First off – the software:
VisualSFM which will do the point cloud extrapolation from your photos. http://ccwu.me/vsfm/
CMVS – adds to the VisualSFM and allows you to rebuild your point-cloud into a pseudo dense mesh. https://github.com/pmoulon/CMVS-PMVS Note: Click on the Clone or download from GitHub, then in the zip file open “BinariesWIn-Linux / Win64-VS2010” Then copy all the files in there and paste them in the same folder as Visual SFM
Meshlab – this app will let you bring in the mesh file, reduce it’s vert noise, build a contiguous mesh from the point cloud, build a single texture map from the various camera shots and export the mesh into a standardized format. http://www.meshlab.net/
3D app – Blender, 3DS Max, Maya, or whatever you use.
Basic workflow – a cell phone will work great for this, a DSLR, obviously, will be even better. I did my tests with a cell phone. I set the camera in “pro” mode where I locked the white balance, aperture & shutter speed down in manual mode so there wasn’t any auto-exposure occurring. Then take anywhere from 35 to 75+ shots of your target object. I did a test with the rough bark of a Douglas Fir tree. The key is to try to bracket your object with shots – putting an imaginary grid in the air and taking a shot from each square. With an object on the ground, you slowly step around it taking multiple shots as you go trying to maintain a steady distance and offset each time.
Once you have the shots, dump them all into a folder and open up VisualSFM. You then Click on Compute missing matches, which will look at all your images, then doing comparisons between images and figuring out the point cloud vert locations. You’ll then Compute 3D Reconstructions to build the 3D point cloud from the images.
After that, you will load the file up in Meshlab and convert it from a point cloud into 3D geometry.
This is a great tutorial on how to go through the process: https://www.youtube.com/watch?v=D6eqW6yk5
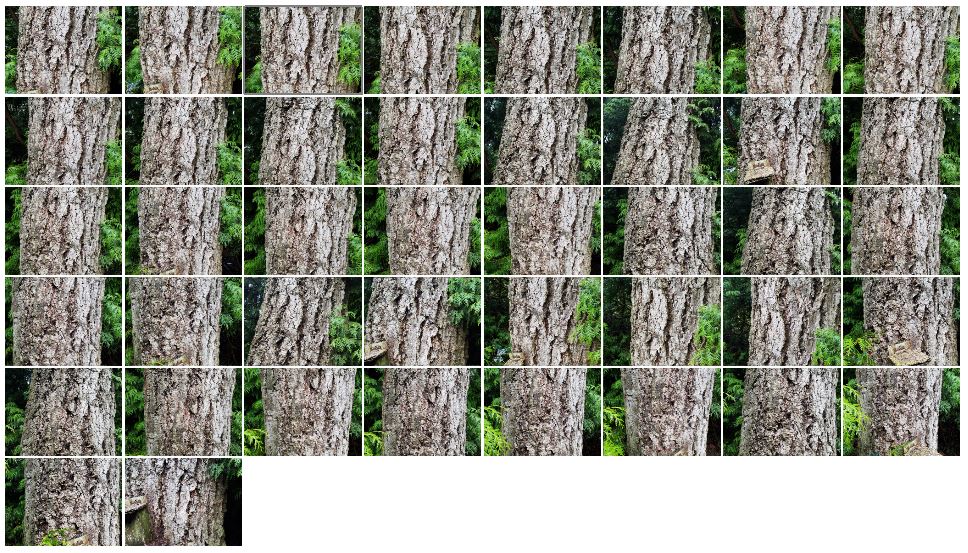
This is the set of images from the bark of a Douglas Fir tree.
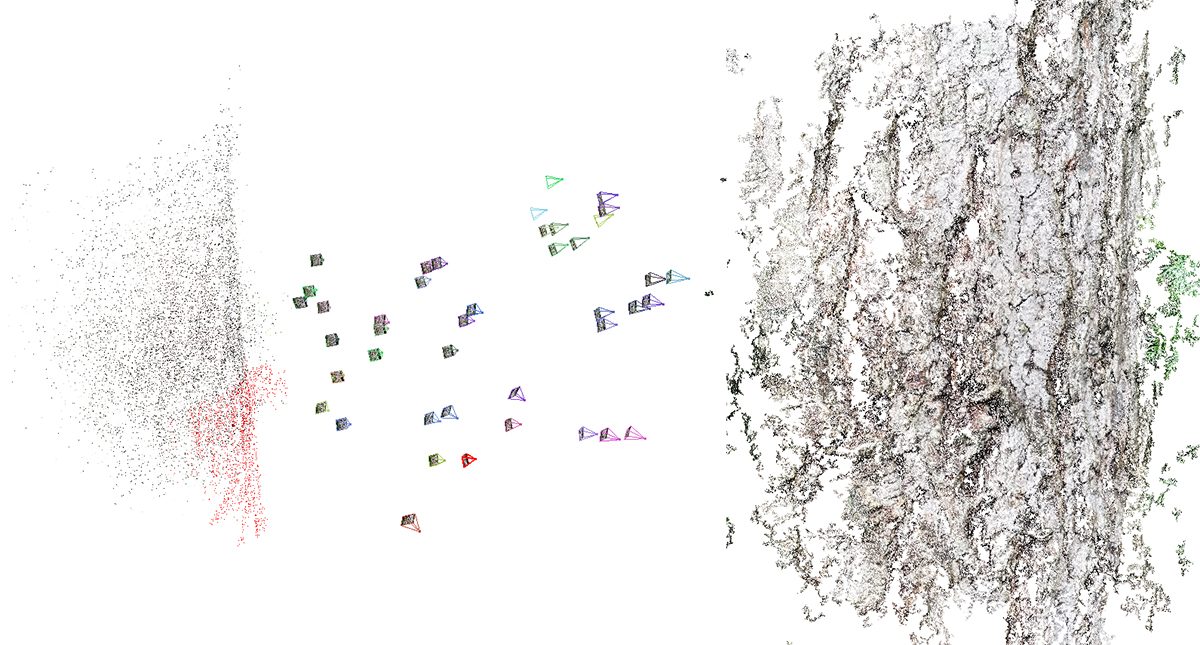
The point cloud with the points & photo locations on the left, and the dense 3D cloud closeup on the right.
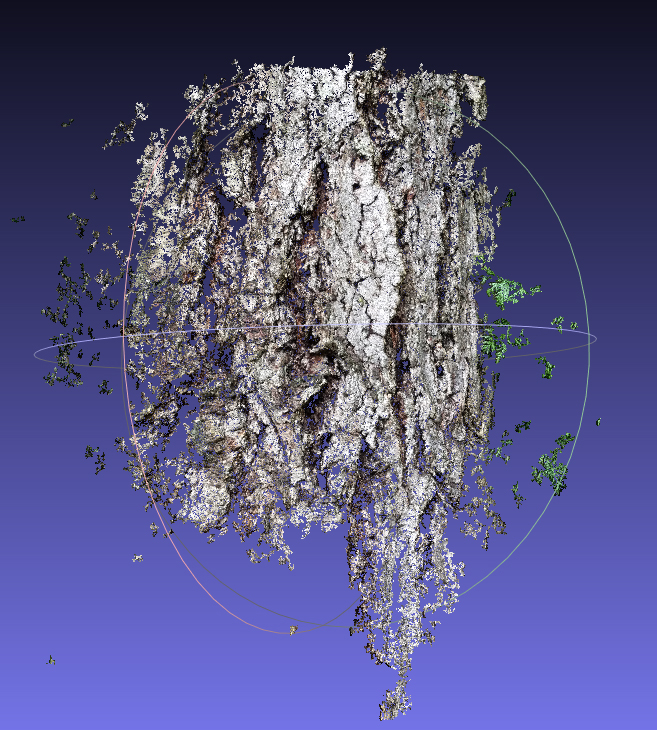
Here’s the point cloud prior to converting into geometry in MeshLab.
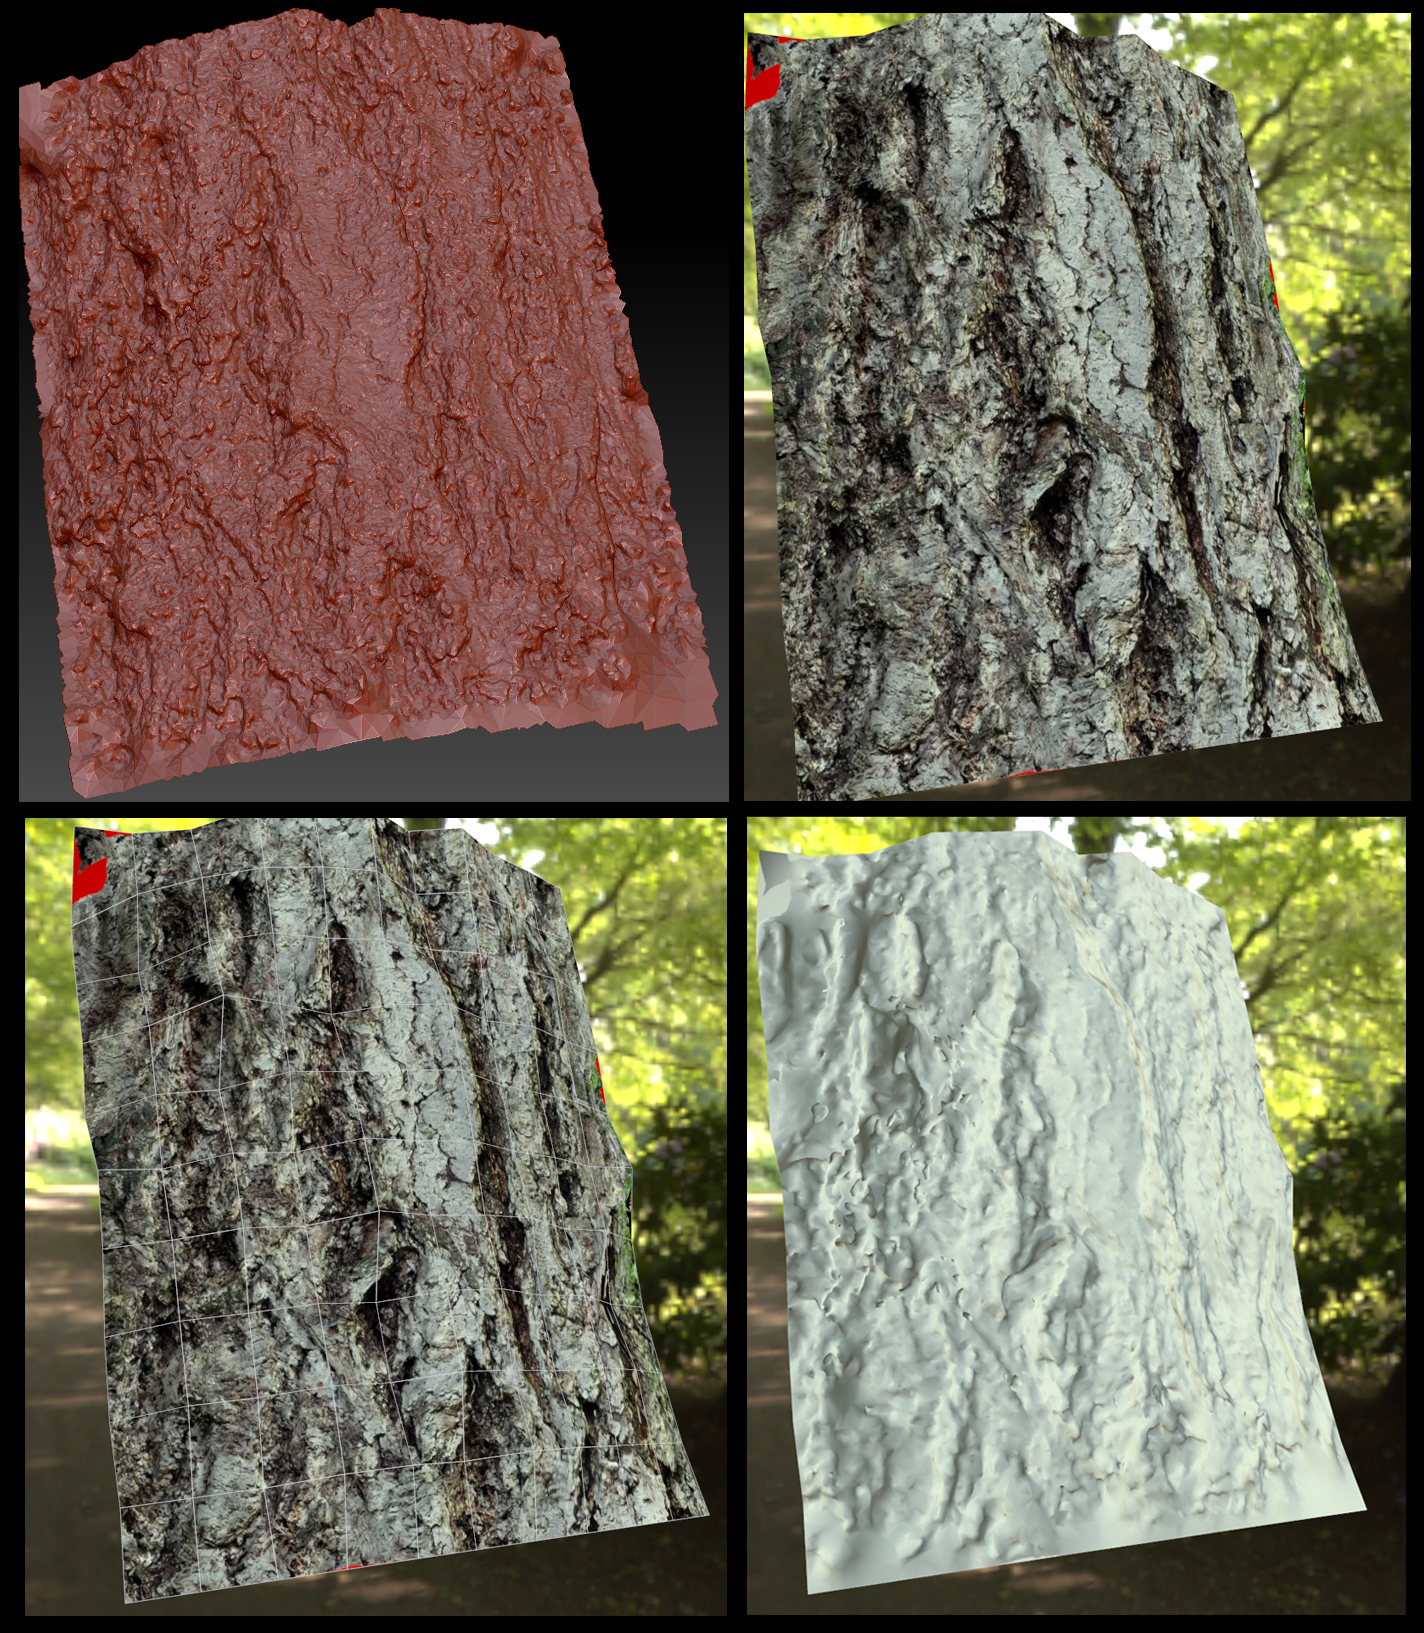
Top left image is in Zbrush where you can see the fidelity obtained from the point cloud. Approximate poly count is 1.4 million polygons. The other images are of a low polygon (200 triangle) mesh that was created in 3DS Max, then a projection modifier along with Render to Texture was used to create the low poly version with matching texture as well as an extracted normal map. These were set up and captured in Marmoset Toolbag showing the result in a low-poly workflow.
 |
 |
 |
|---|---|---|
 |
 |
 |
 |
 |
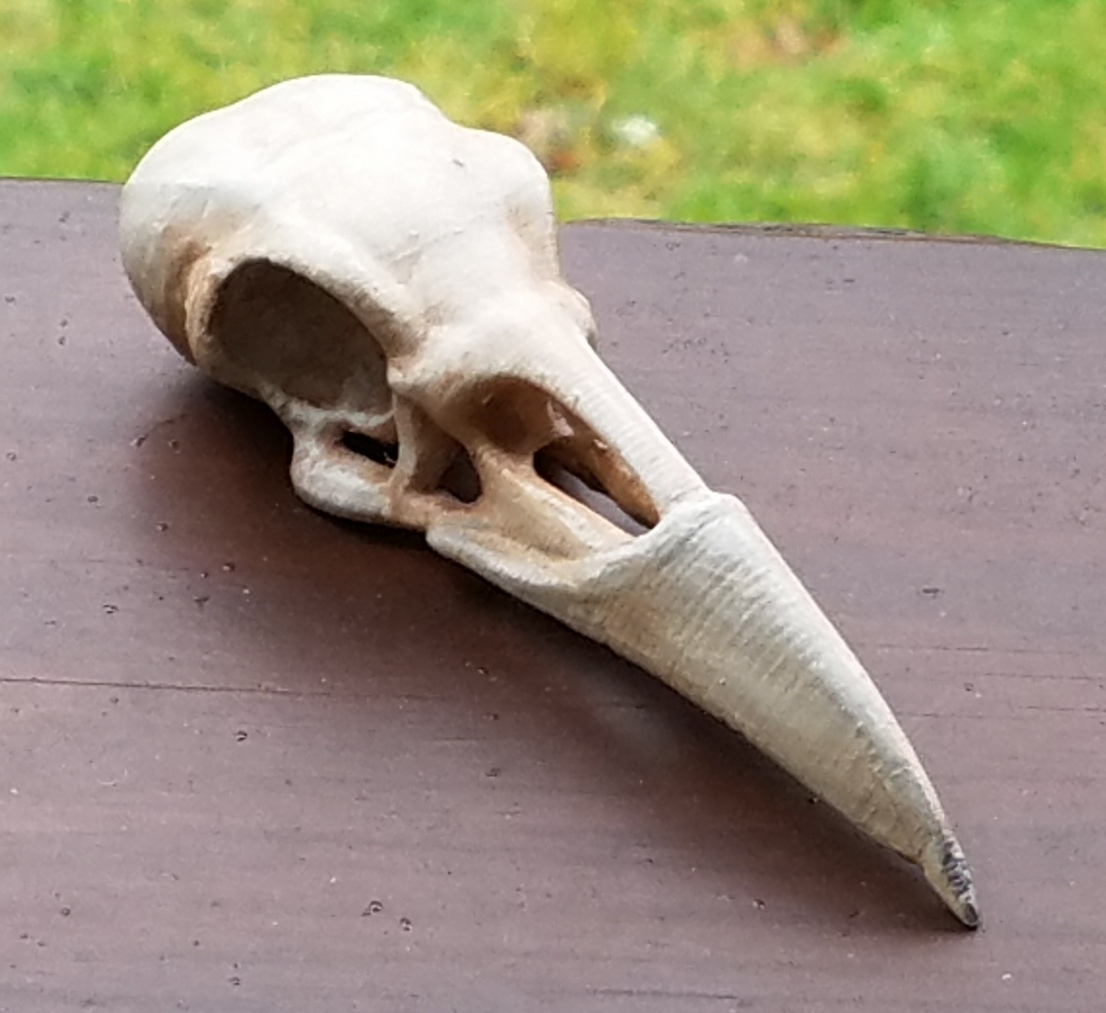 |
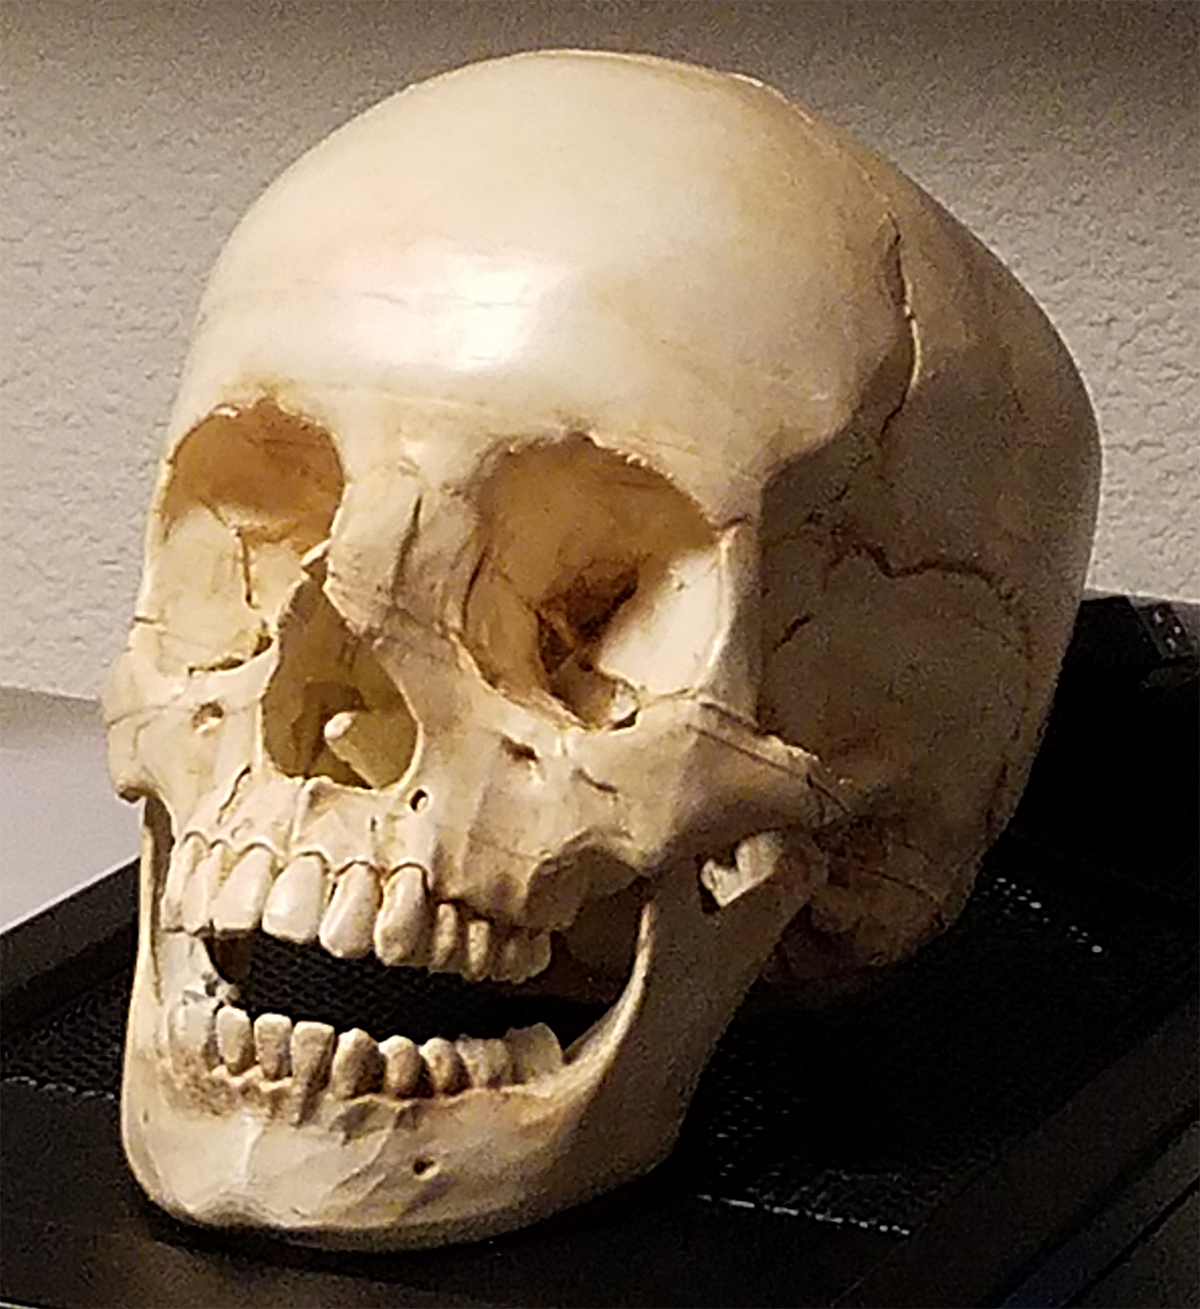
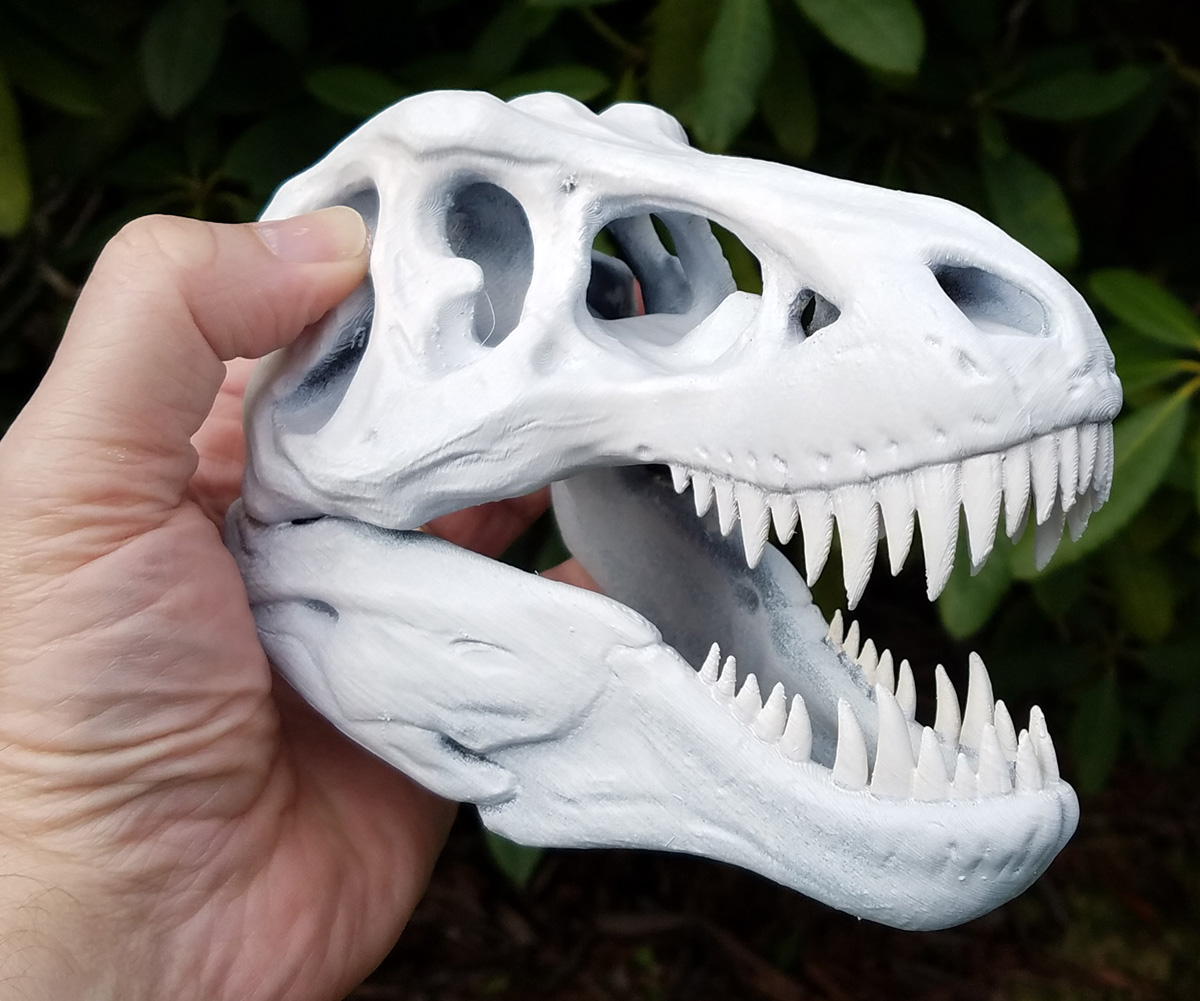
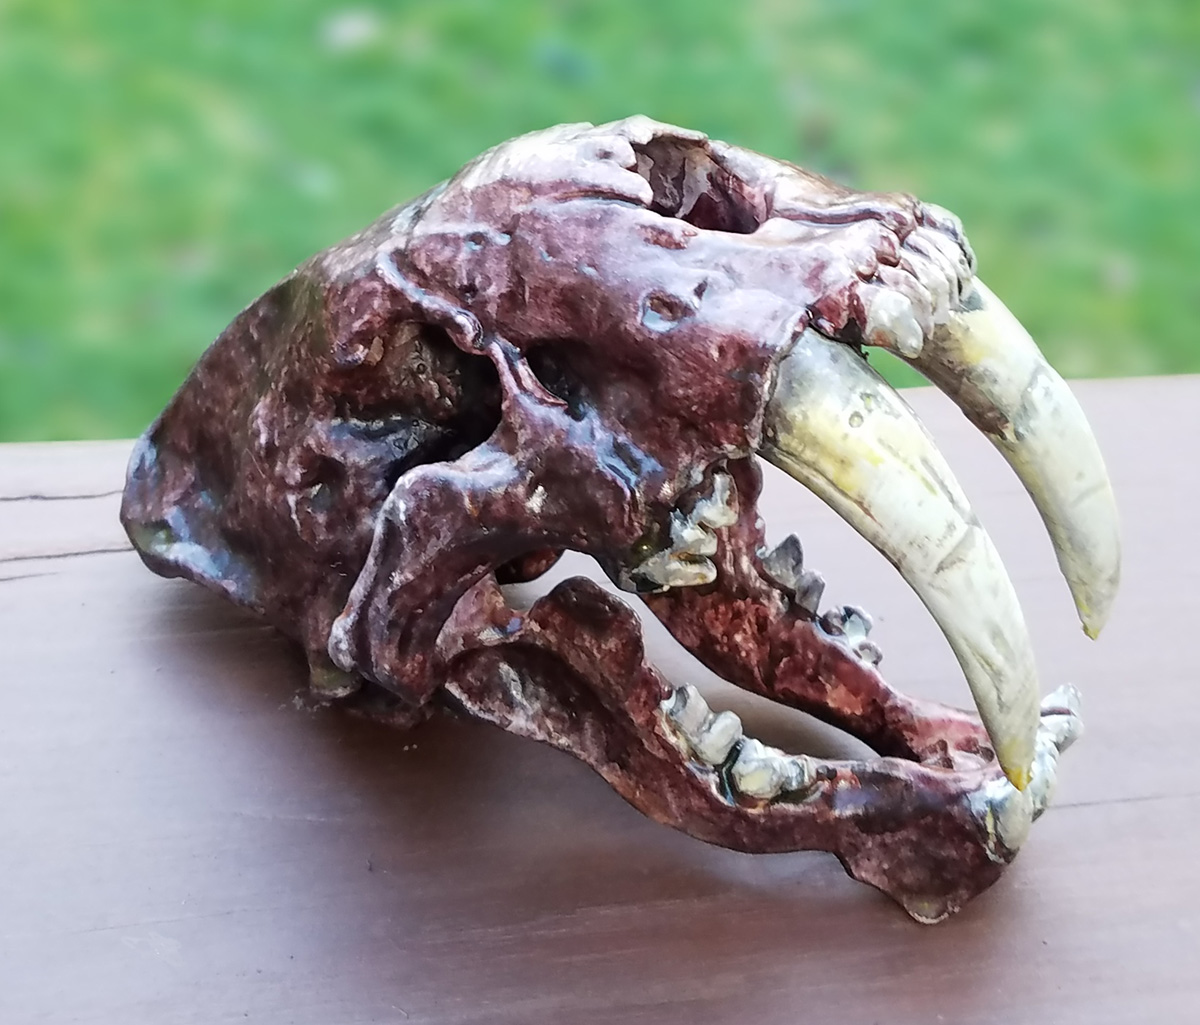
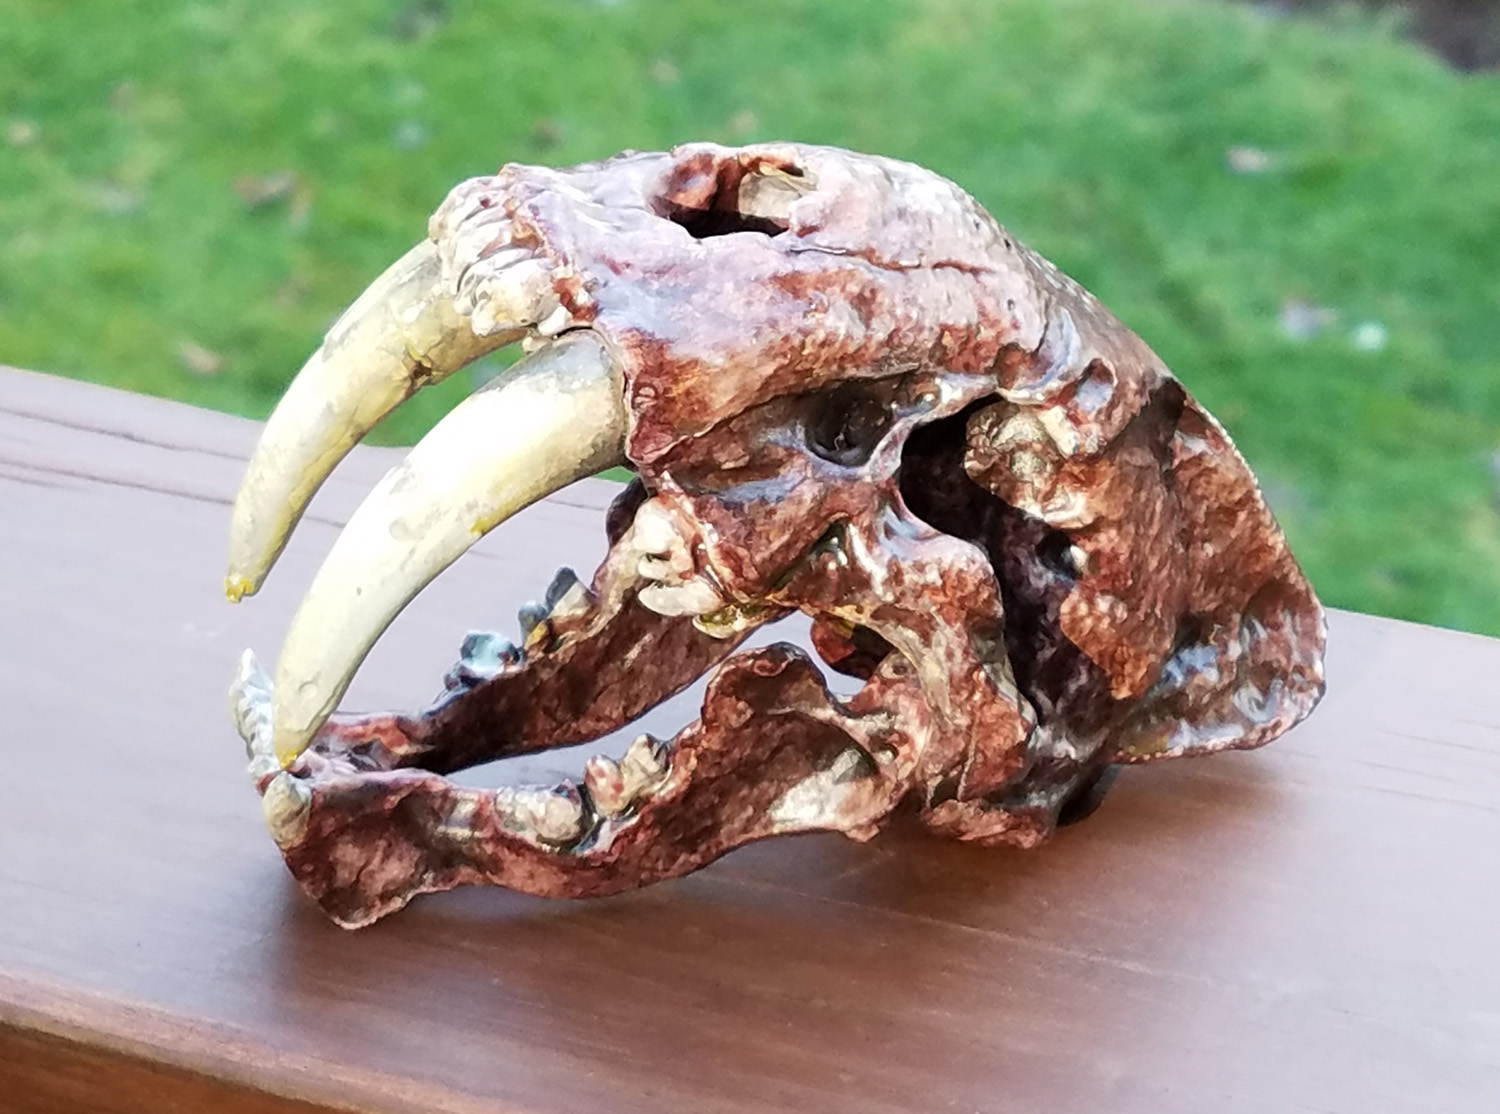
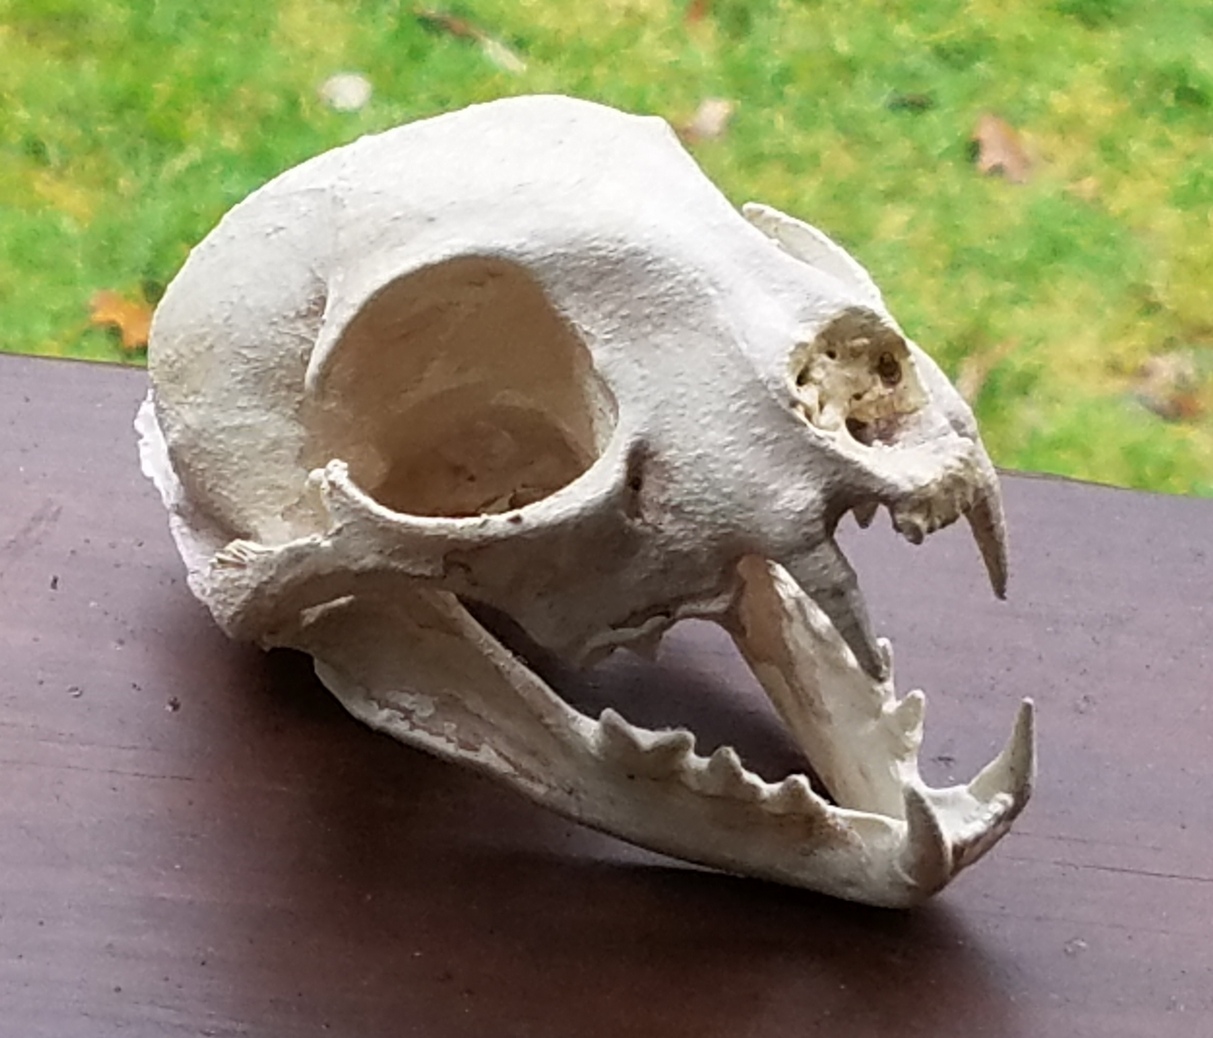
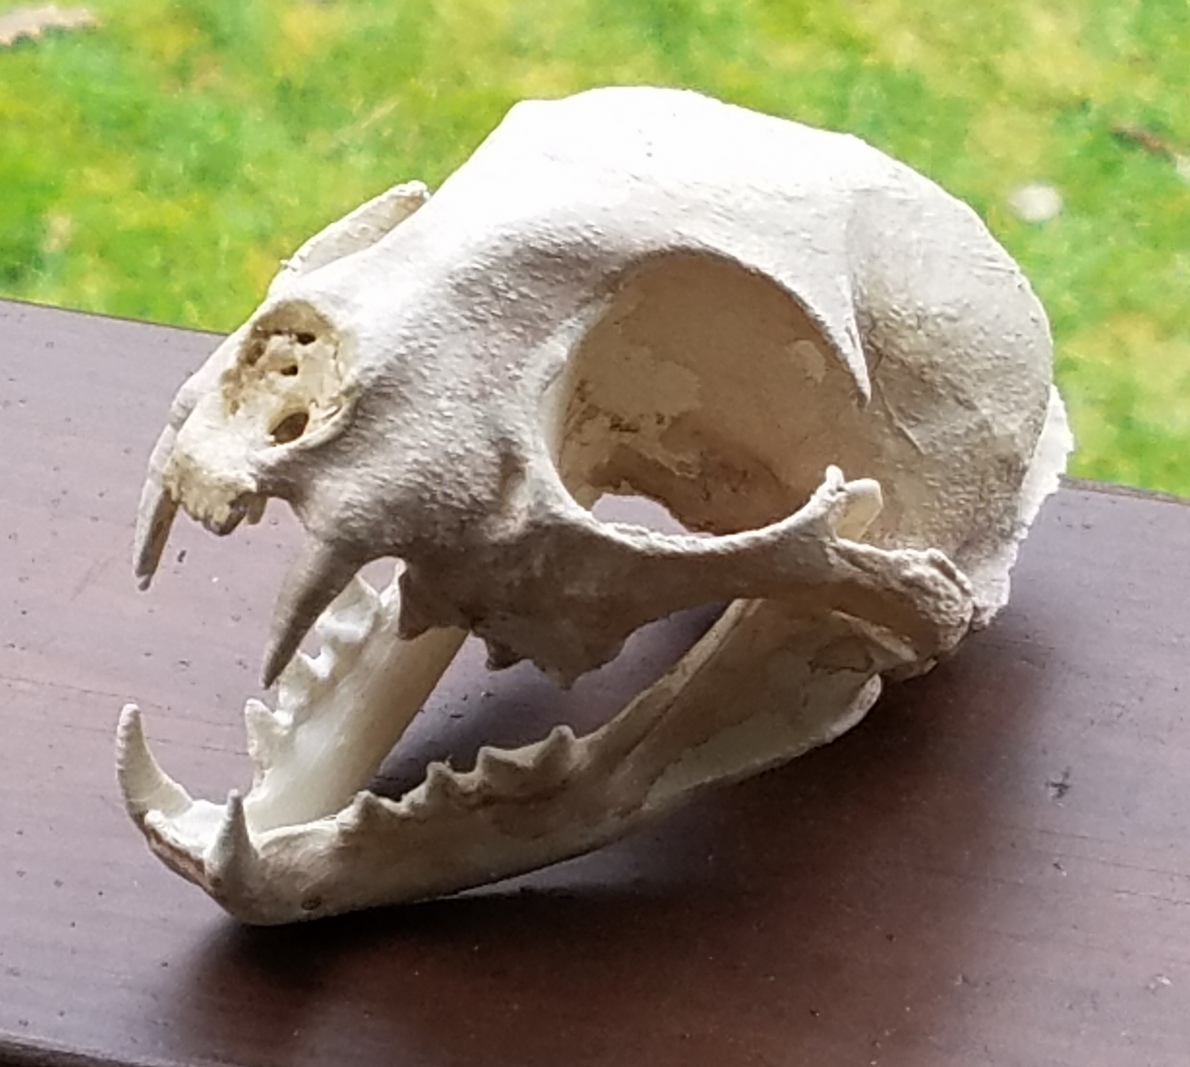
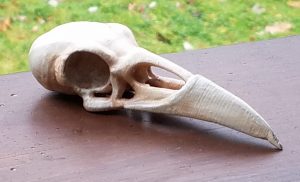
Some prints from my MakerGear M2 3D printer. T-Rex skull, Saber-tooth Tiger skull, Bobcat skull and a Raven skull. I’ve been painting them to see how they look with something other than the default filament colors. The last is an anatomically correct, full scale human skull. It took 4 print runs and about 25 hrs. to complete.
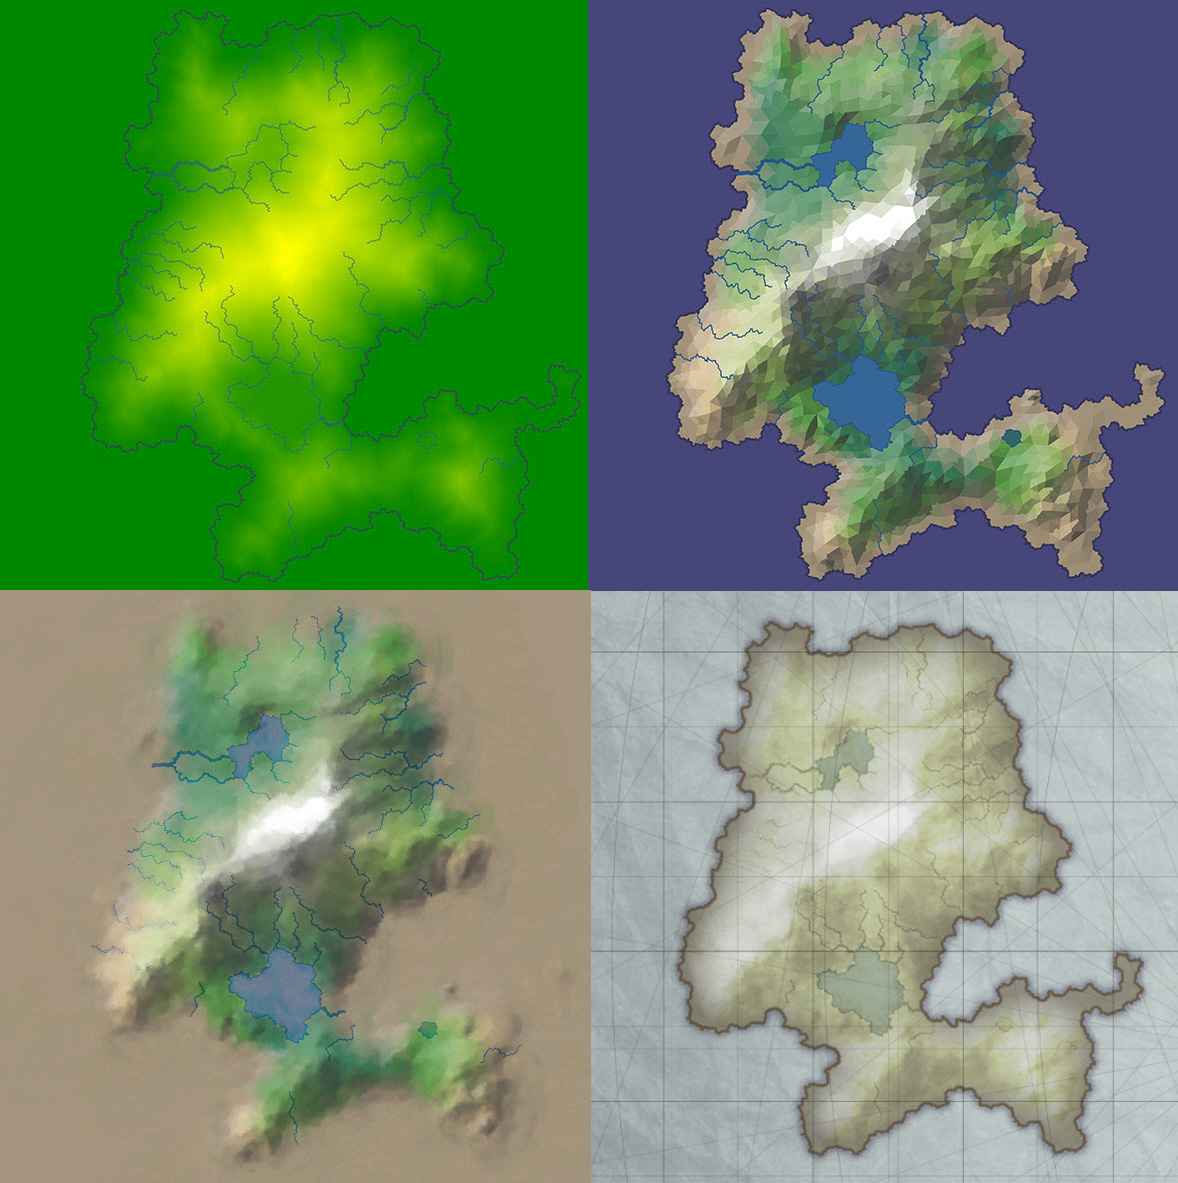
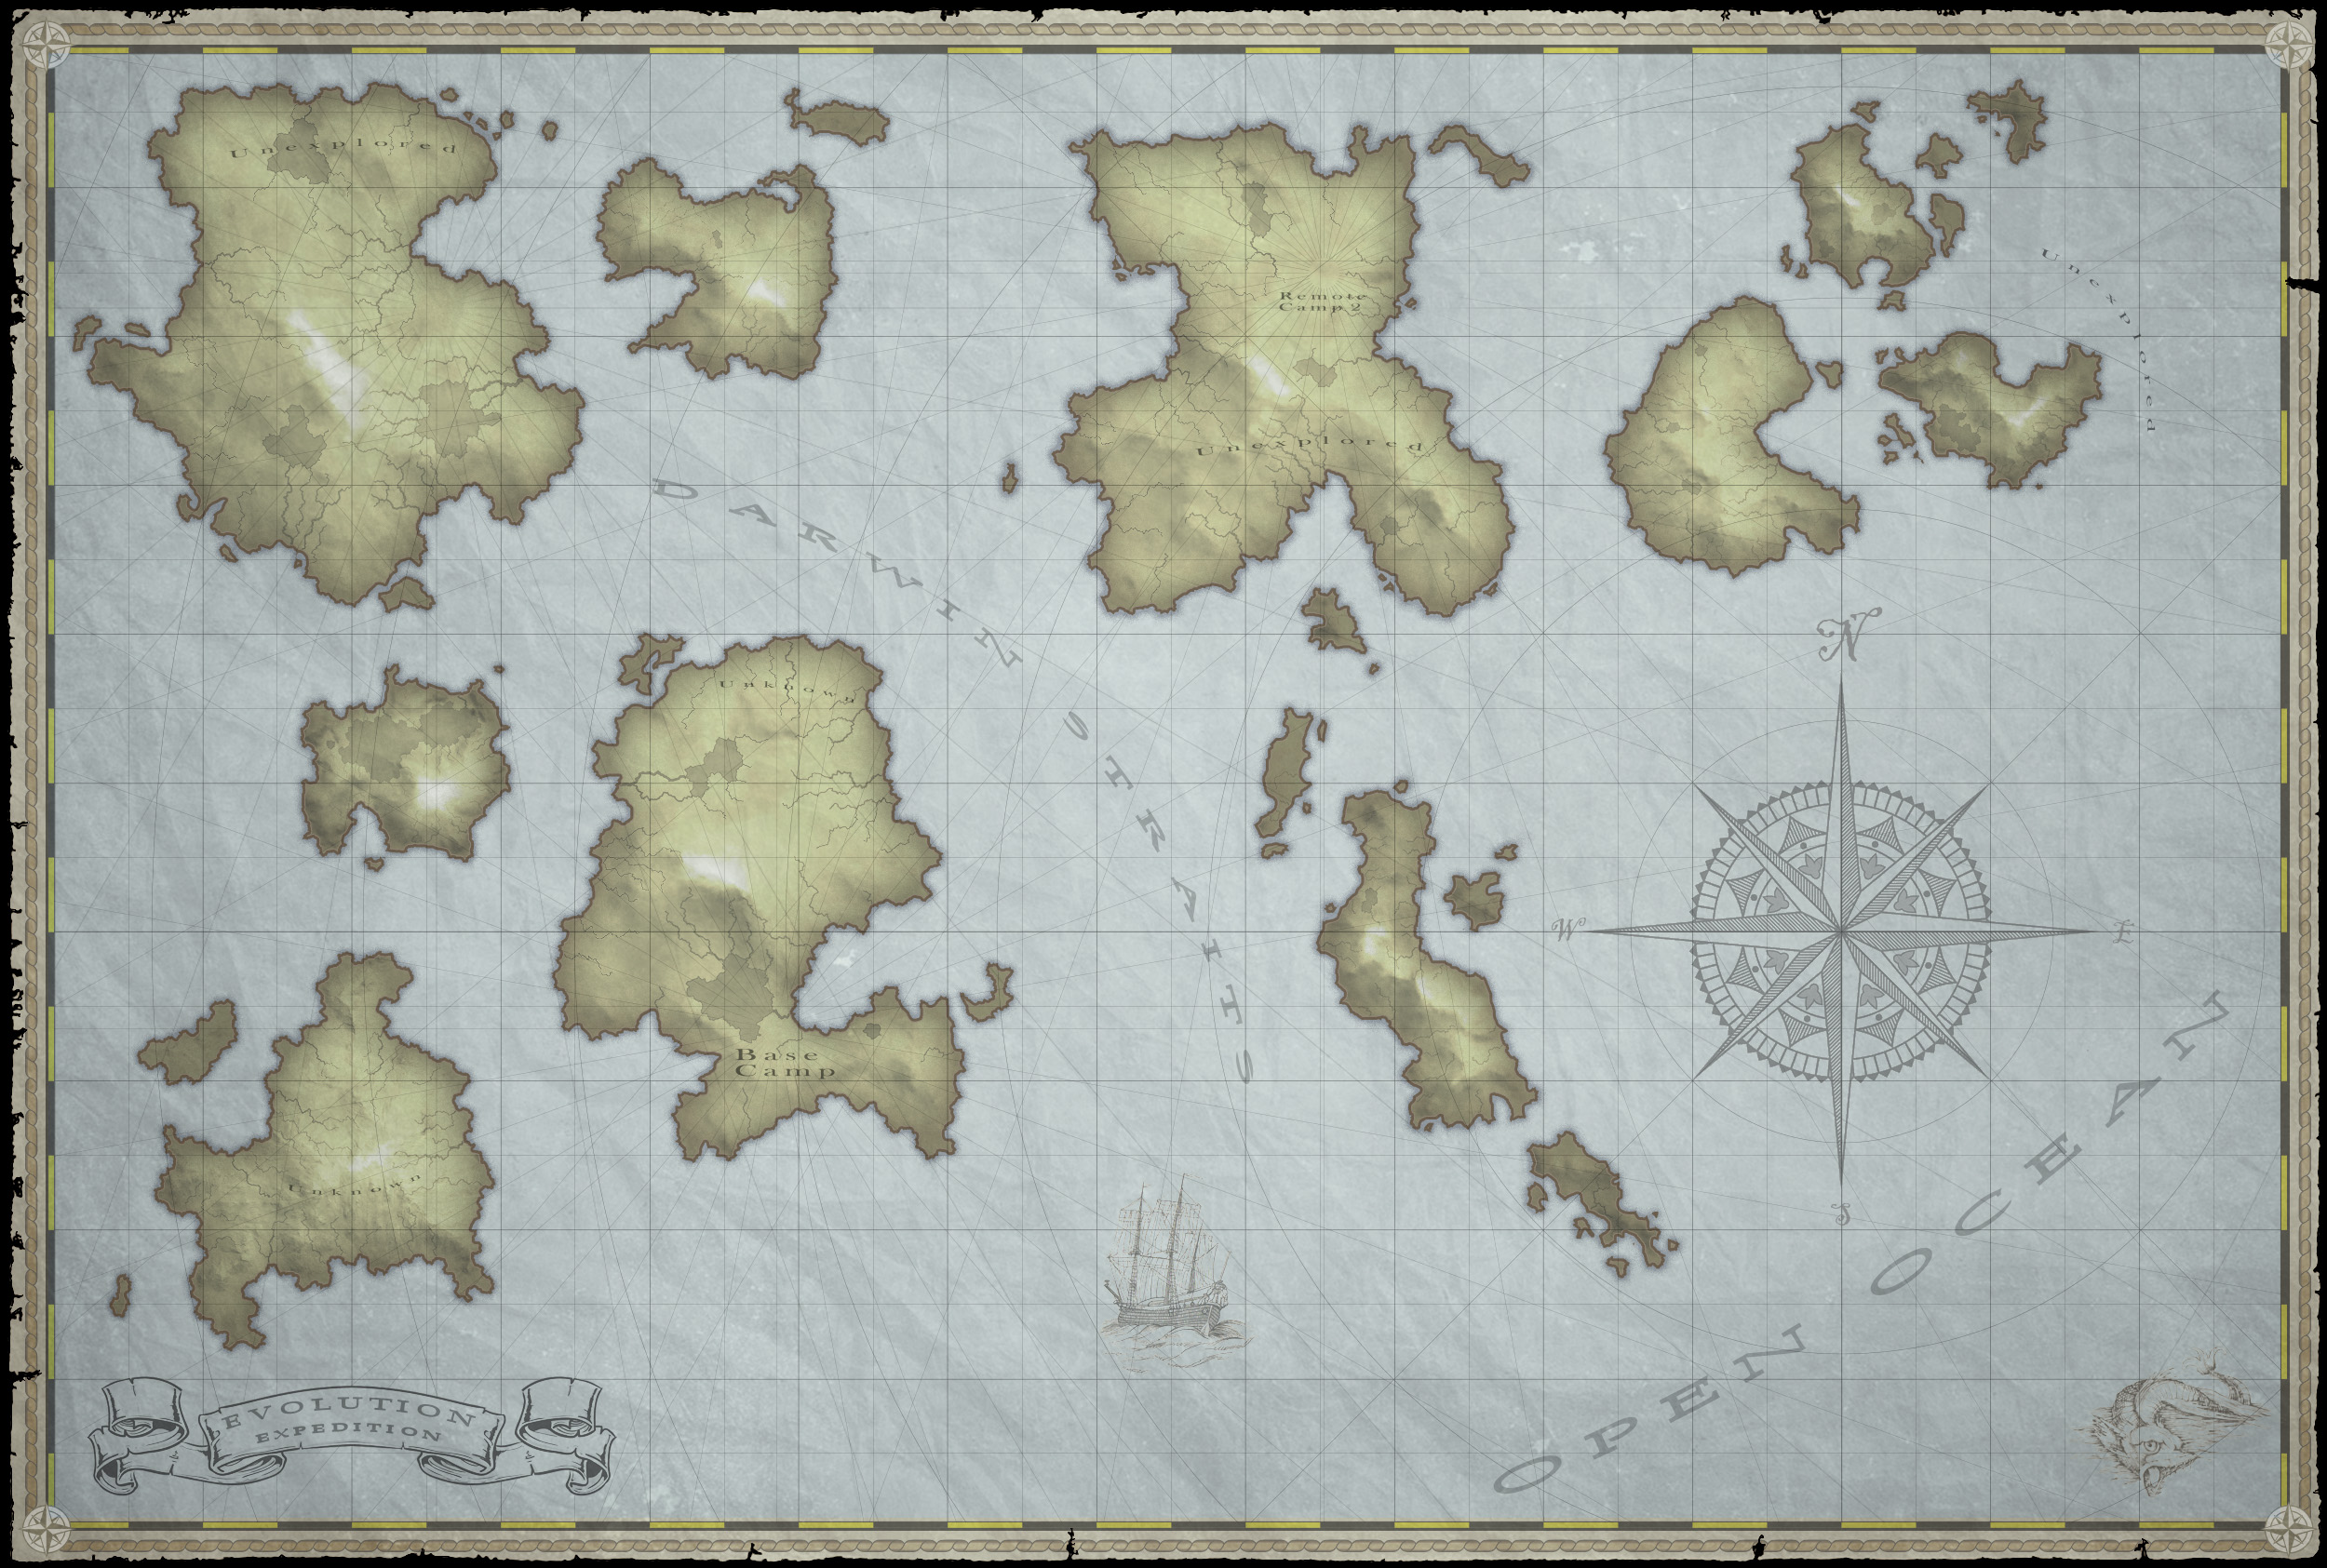 This was a project where I needed to generate a random, but realistic old-world style map. I was looking for a somewhat procedural way to generate islands that had topographical features that were consistent with the geometry. So water and lakes would appear where slopes were steepest and where it would naturally pool in the geometry. This could have been custom built in 3D, but I was looking for a faster way to do this since iteration on the islands, their positions, etc. was very likely. I found an online, map generation application from Stanford University that would randomly create an island based upon a seed number. It also had unique features like topographical height maps & water features. The results were okay, but not to the quality level I was looking for. So my method was to use the map generation software, then take the height map information into World Machine, and generate a simple render from it, then take the result into Photoshop and Painter to make it look more old-world and hand drawn/painted for the map.
1. Map generator: http://www-cs-students.stanford.edu/~amitp/game-programming/polygon-map-generation/demo.html From this app, I would randomize until I got an island I liked, then saved off the 2D Slope & Elevation data.
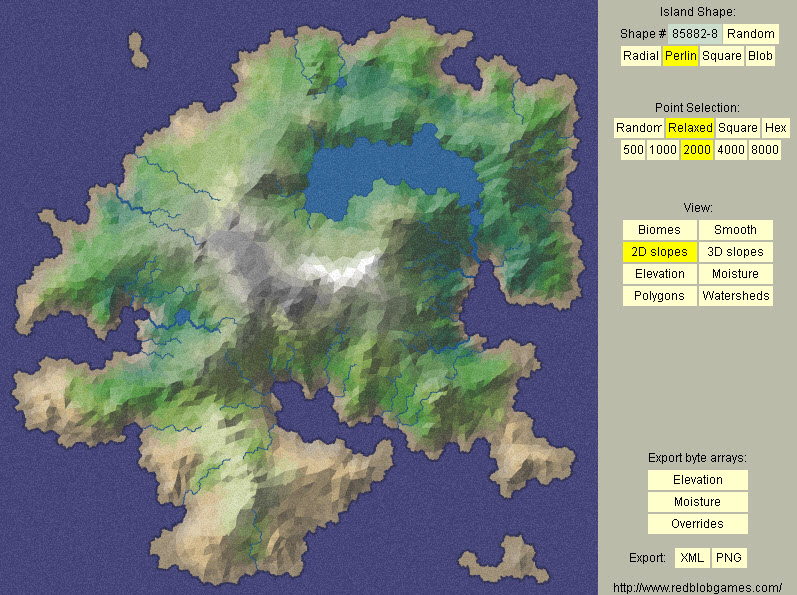
2. In Photoshop, I did editing to clean up and isolate the rivers & lakes from the base image, then fix the elevation data.
3. In World Machine, I created a simple terrain generator that output the results to a raster image.

4. Back in Photoshop I did some composite work to get it prepped for some image filtering.
5. I dumped the image into Corel Painter, and used some custom settings with the watercolor effect to repaint the image as a watercolor.
6. Back to Photoshop and a bit more compositing then some heavy effects settings to the image to outline it, put in some effects that made it blend into the base paper map I had created.
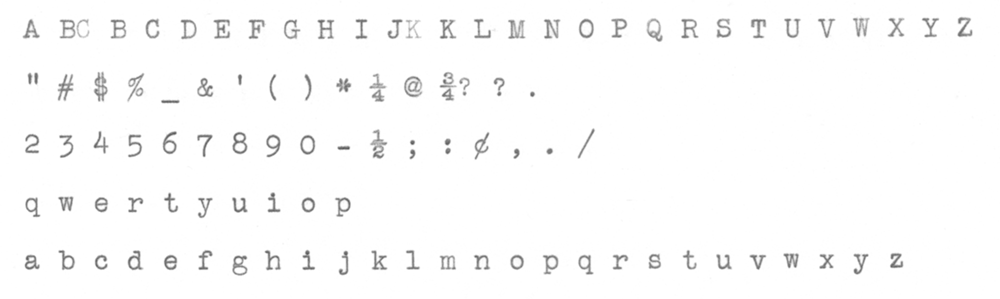
This was a font I created from a 1930 Smith Corona typewriter.  The goal was to create a TrueType or OpenFace font that could be used in Photoshop, Illustrator and converted to a game font for use in a UI system. The first step was to type out all characters and then scan and clean up the image. Each text “cell” was a 1024 x 1024 image so the overall file was quite large (26,624 x 4096). Each cell was saved off and brought into Illustrator to auto-trace it. Auto-traced results were cleaned up and simplified by reducing the vertex count. After auto-tracing, each cell was saved off in .svg format. The .svg cells were brought into FontForge and put into the appropriate cell. Kerning, baseline and other adjustments were made within the software as well as fine-tune adjustments to the overall outline spline for each letter. It was output as an OpenFace format font. This was then installed as a font in Windows and made available to all of the apps such as Photoshop & Illustrator.
Original Scan.
Cleaned up and boosted contrast.
Font Forge UI.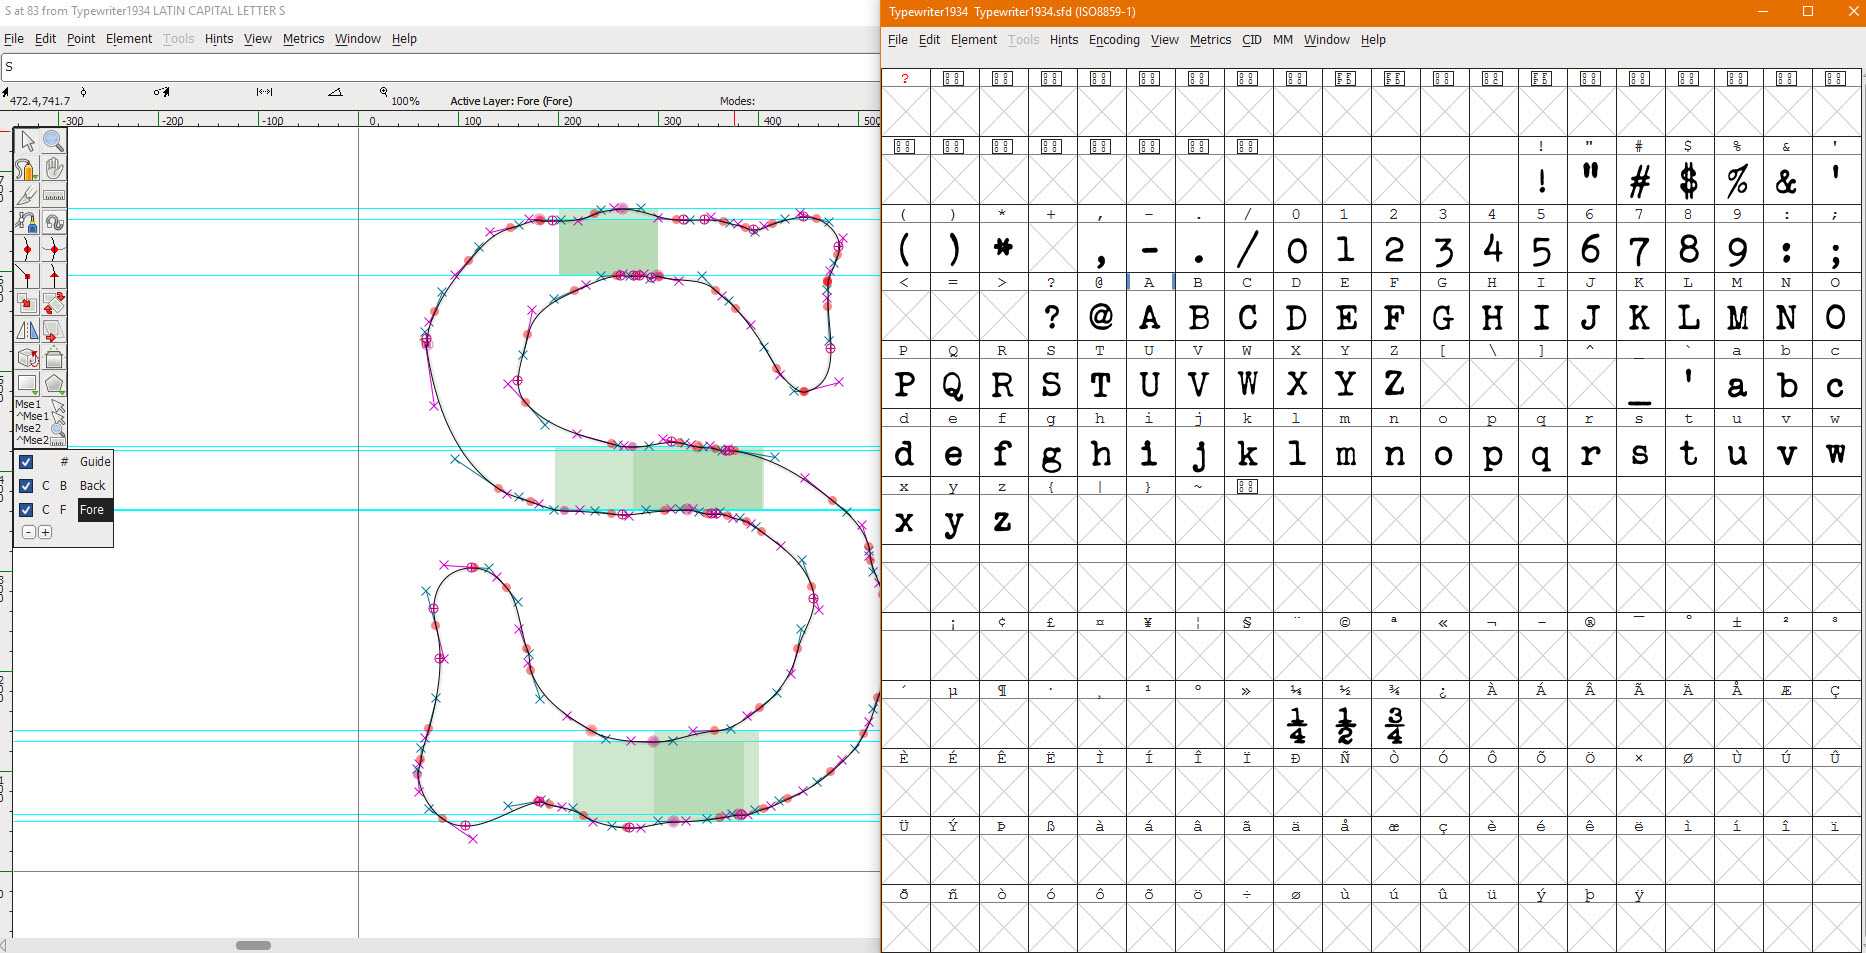
Example of Font after installation in Windows.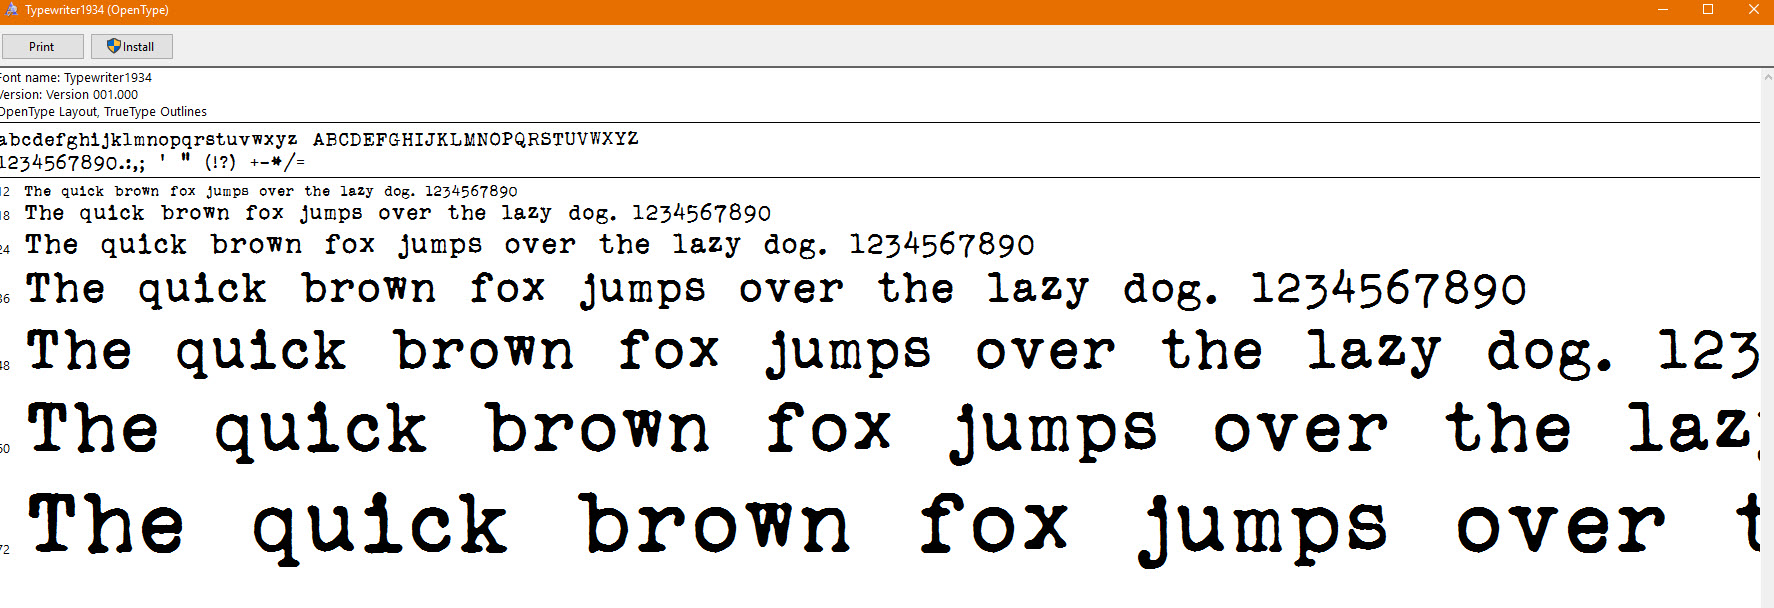
Example of font in Photoshop concepts. 
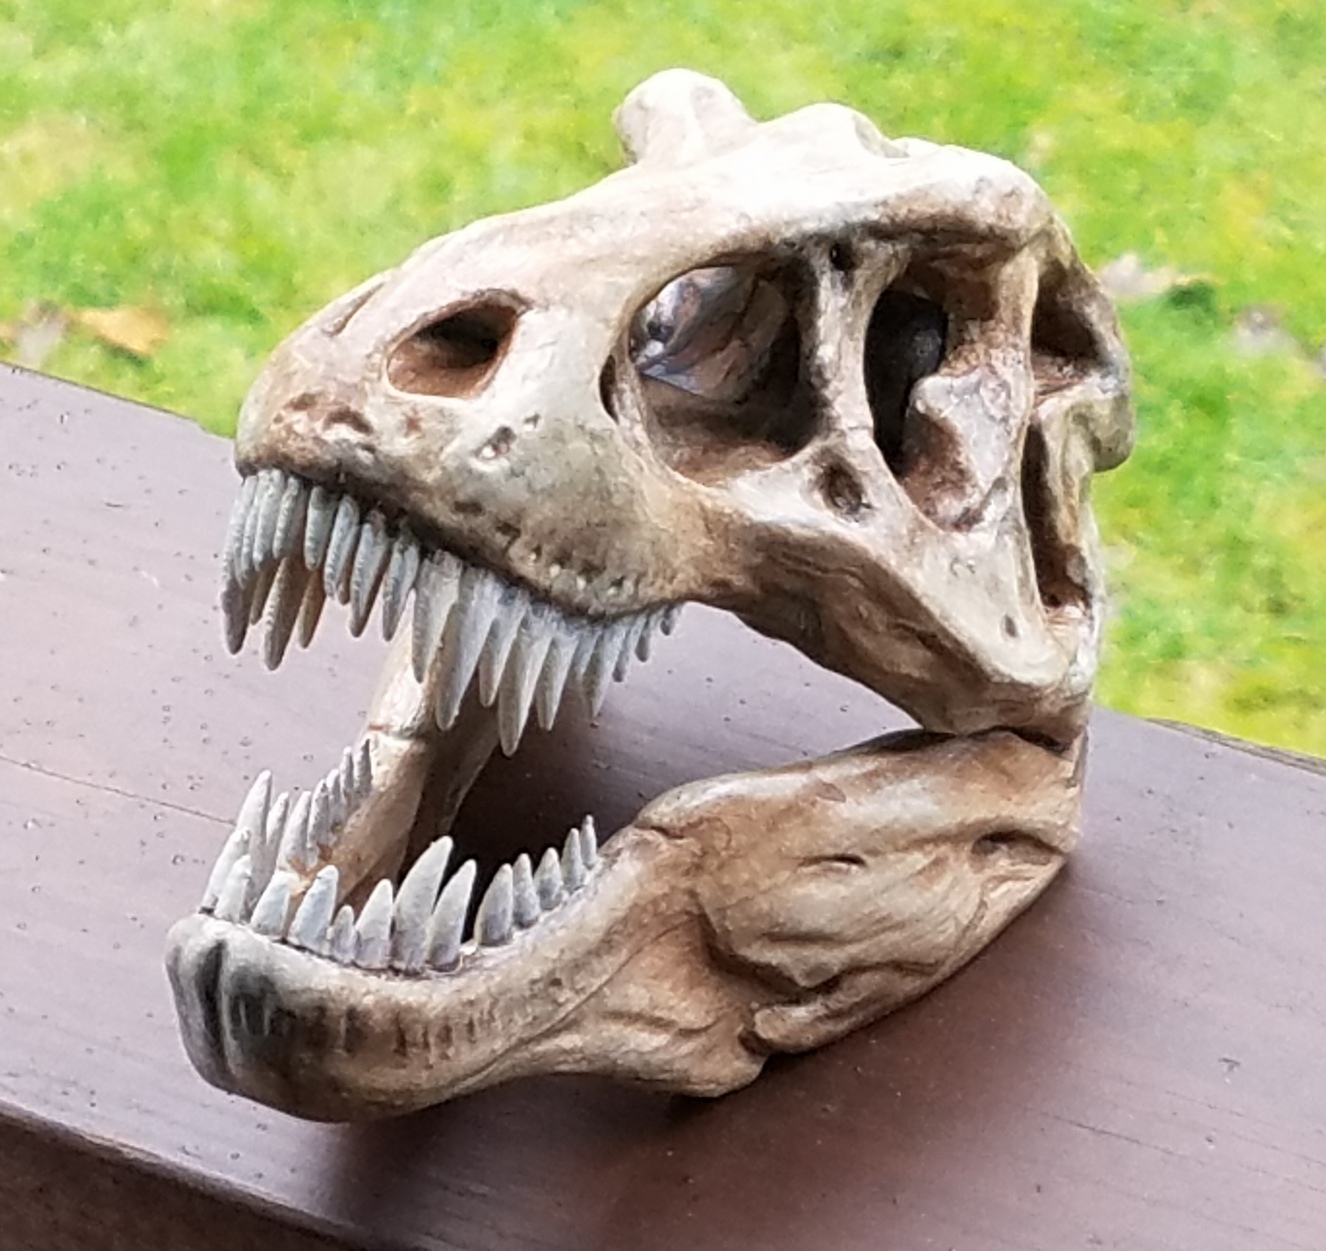
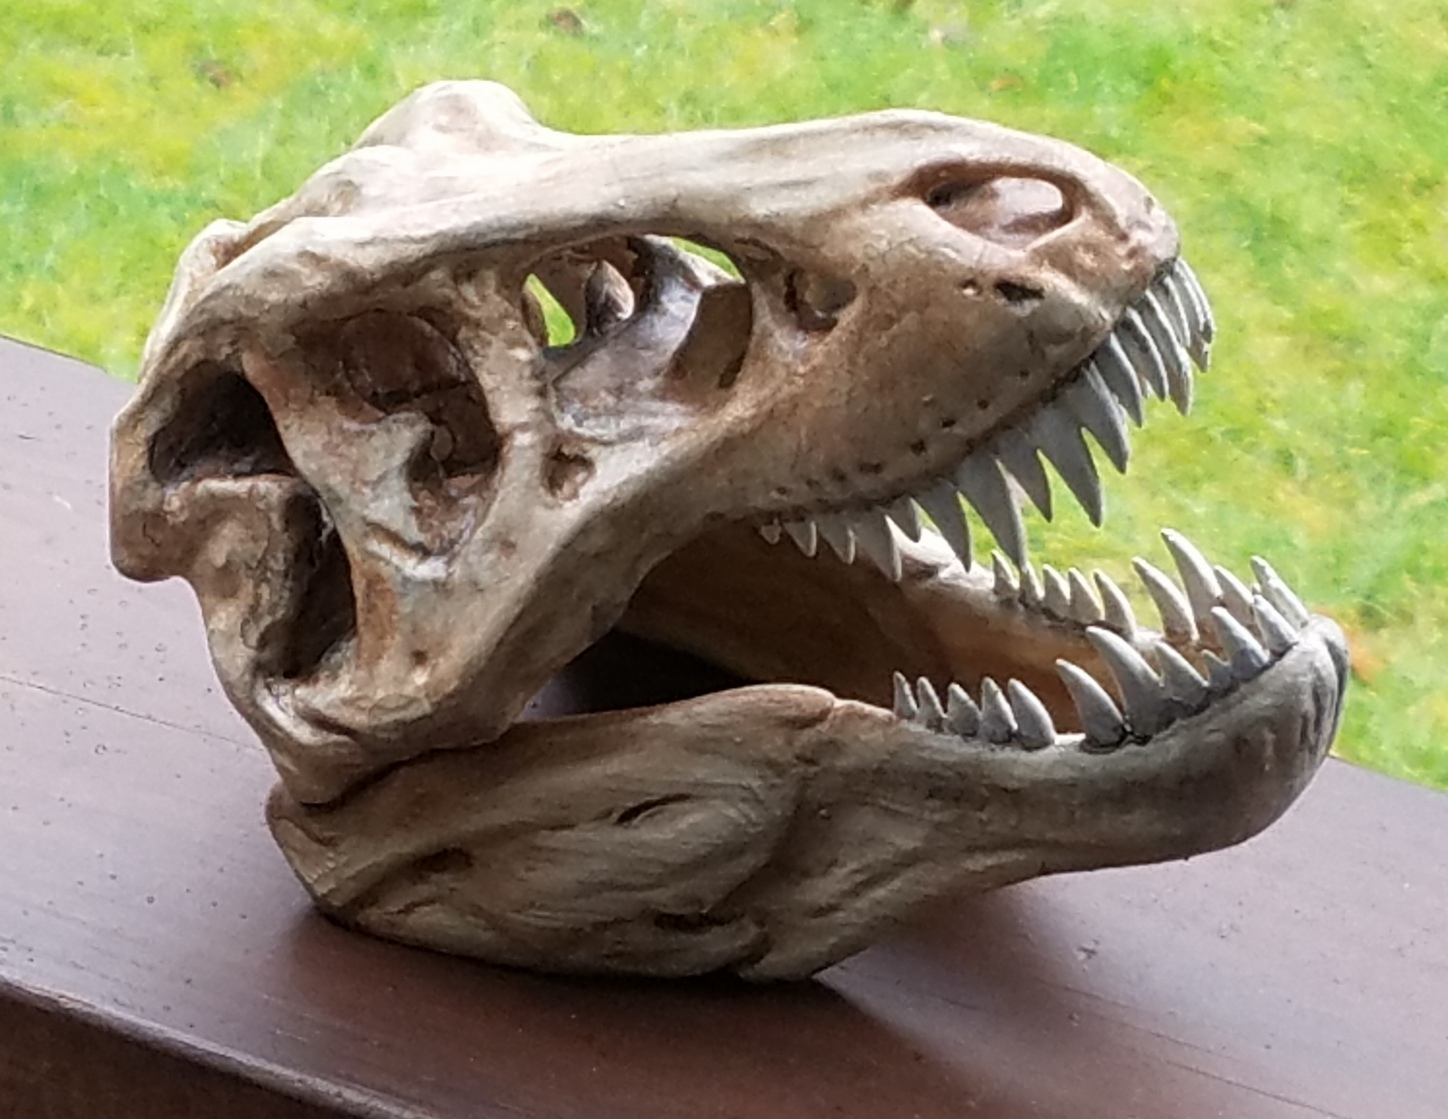
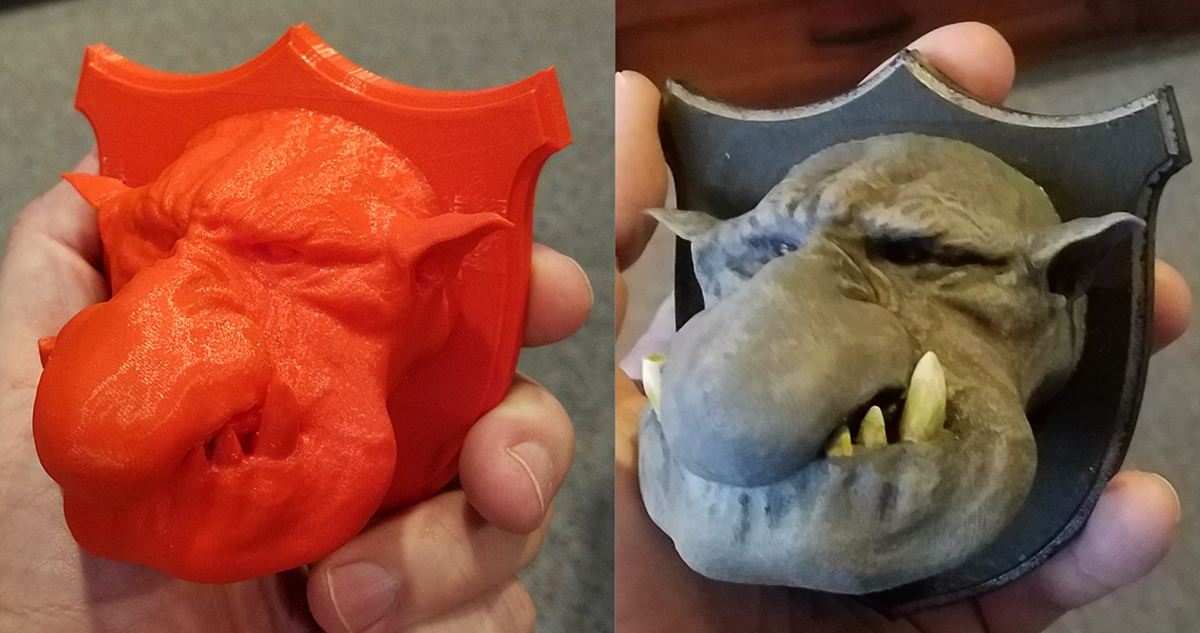
This was printed on a Makergear M2, using PLA+. Modeled in Zbrush. I painted it afterwards just to see how well the paint would fill in the ridges that are a result of the printing process.
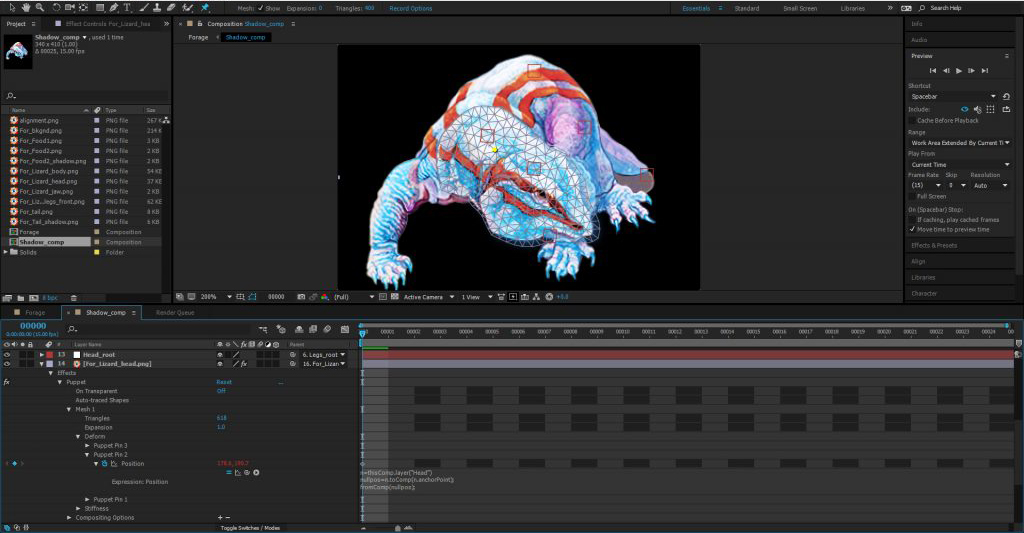
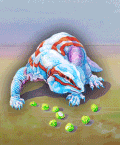
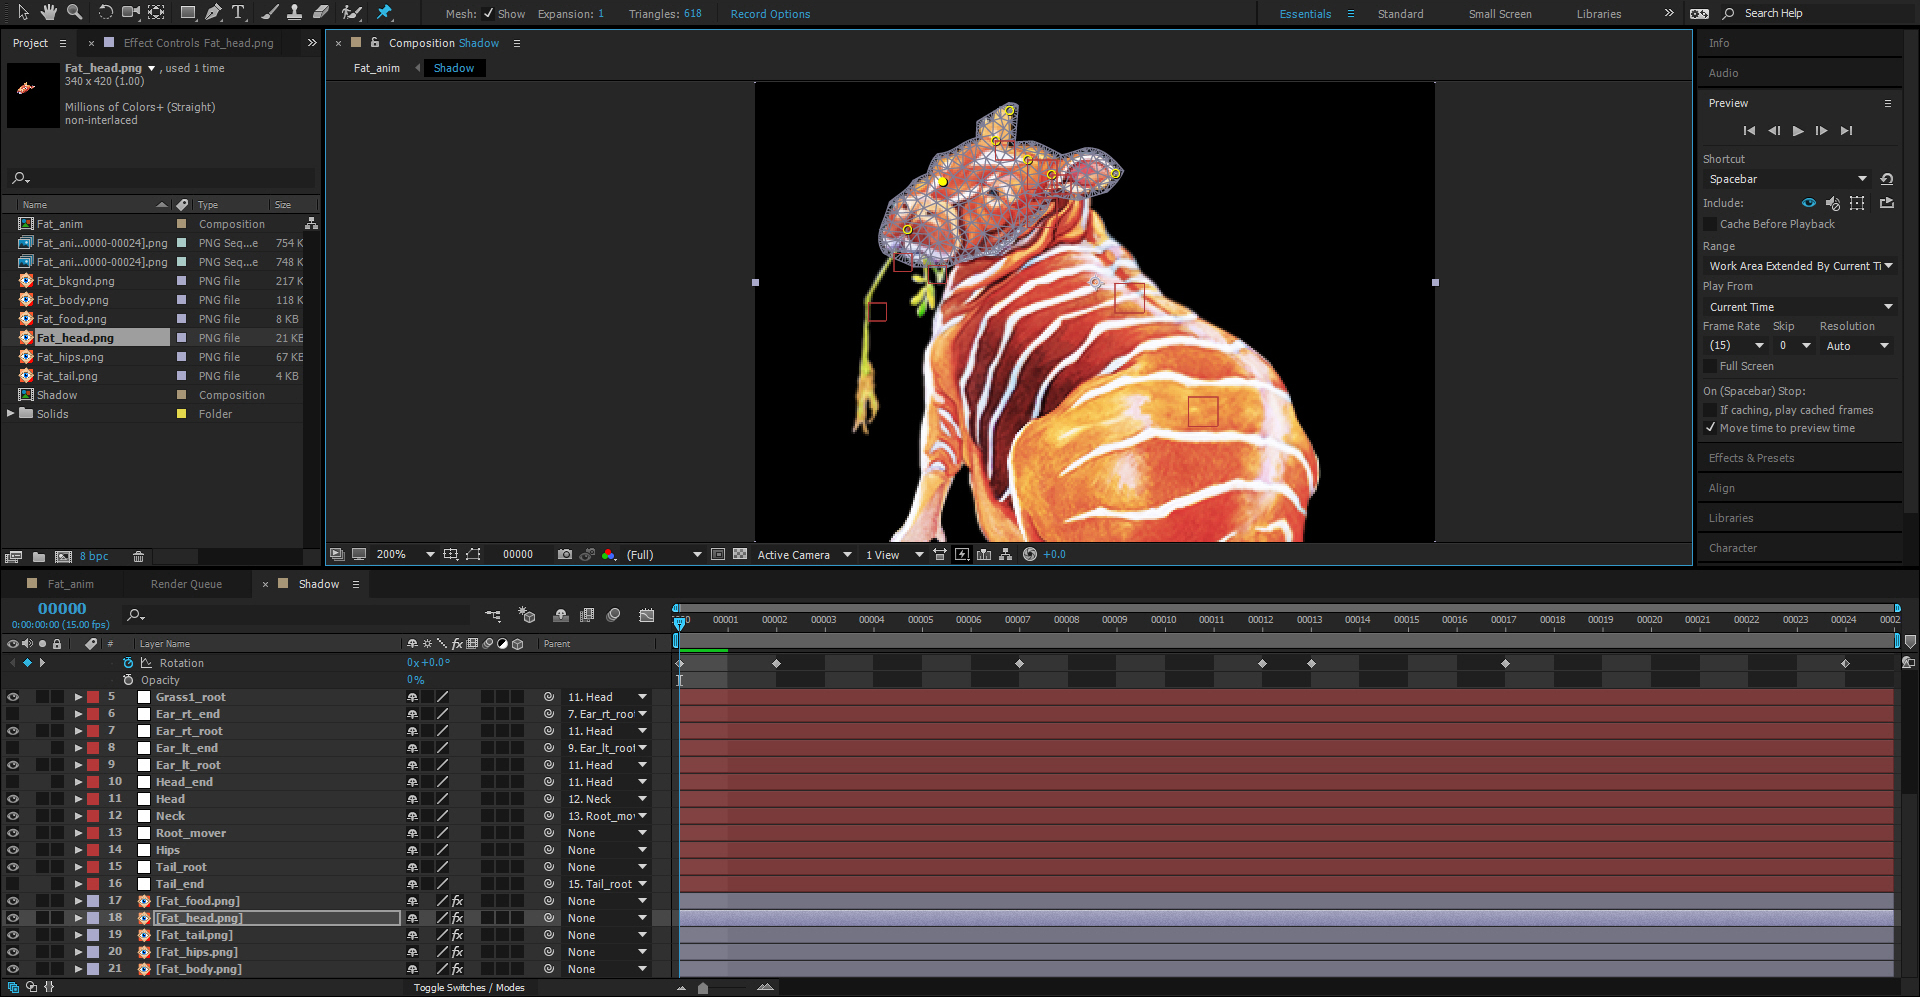
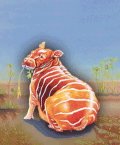
This rig was set up using the puppet warp system present in both Photoshop & After Effects. AE is much more robust as it allows for easier control of animation, expressions and easier key framing. In this version, pins were set up and dummy null objects were added to the scene, then linked to the pins via an expression. This allowed the pins to be controlled via the dummies, which was more akin to regular rigging systems. The goal on this project was to use existing artwork, and split it apart, puppet animate it with simple, short, cyclical animations that played quickly.
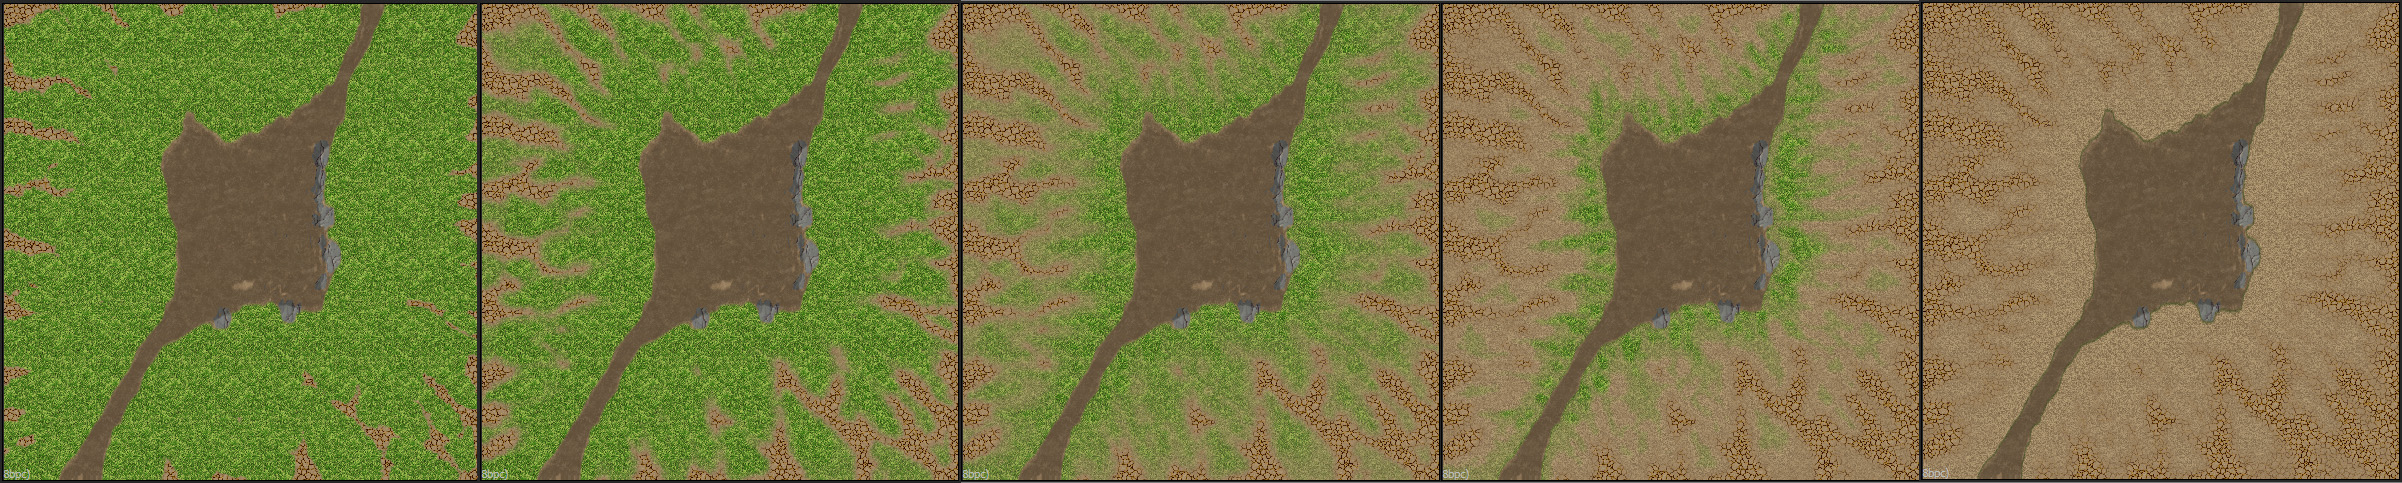
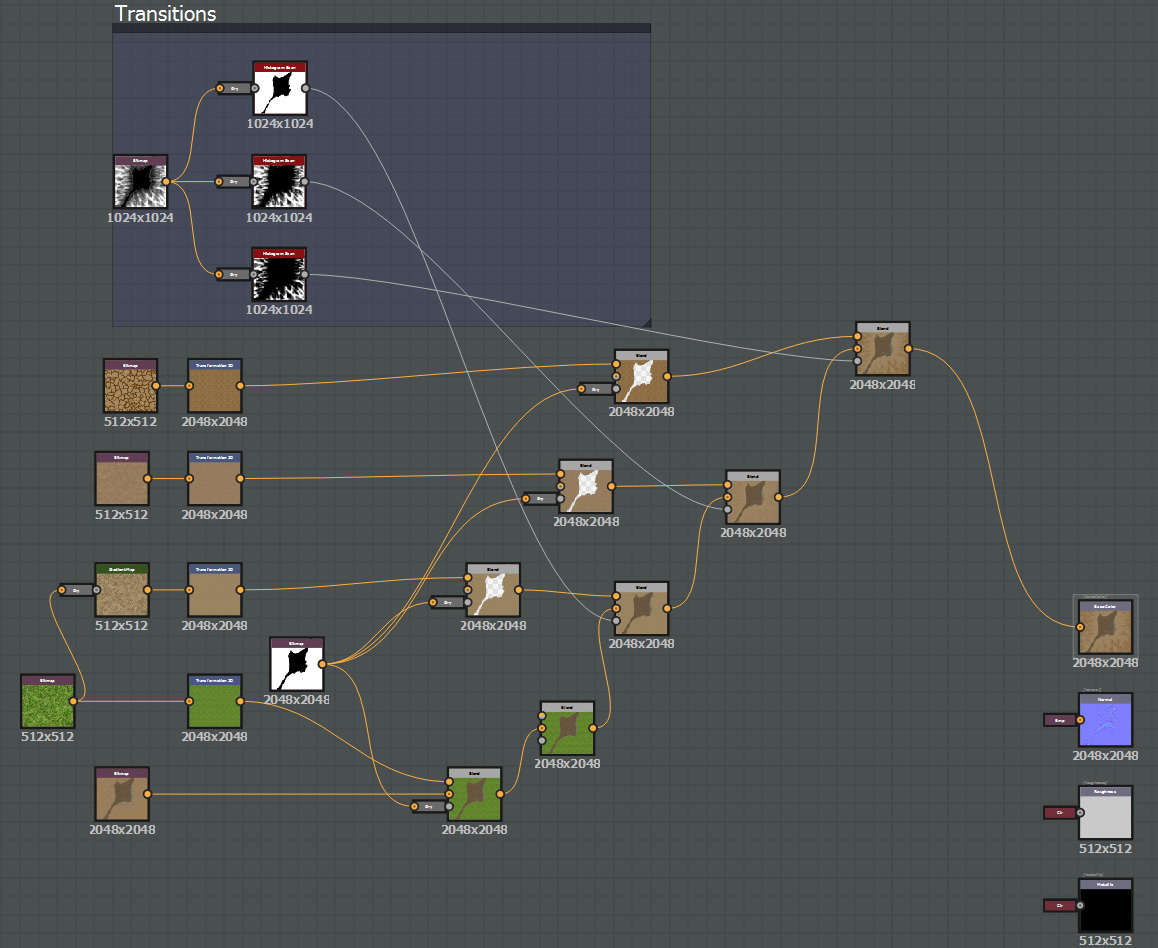
This shader had 2 main effects. It used put a simple sine wave through the verts to allow for motion. The amount the vertex moved is based upon how much color is painted into the vertex. There was also a slider that allowed the base texture to be remapped to another gradient. In this case, lush greenery was remapped to a more dead looking color range. Built in Shader Forge for Unity.
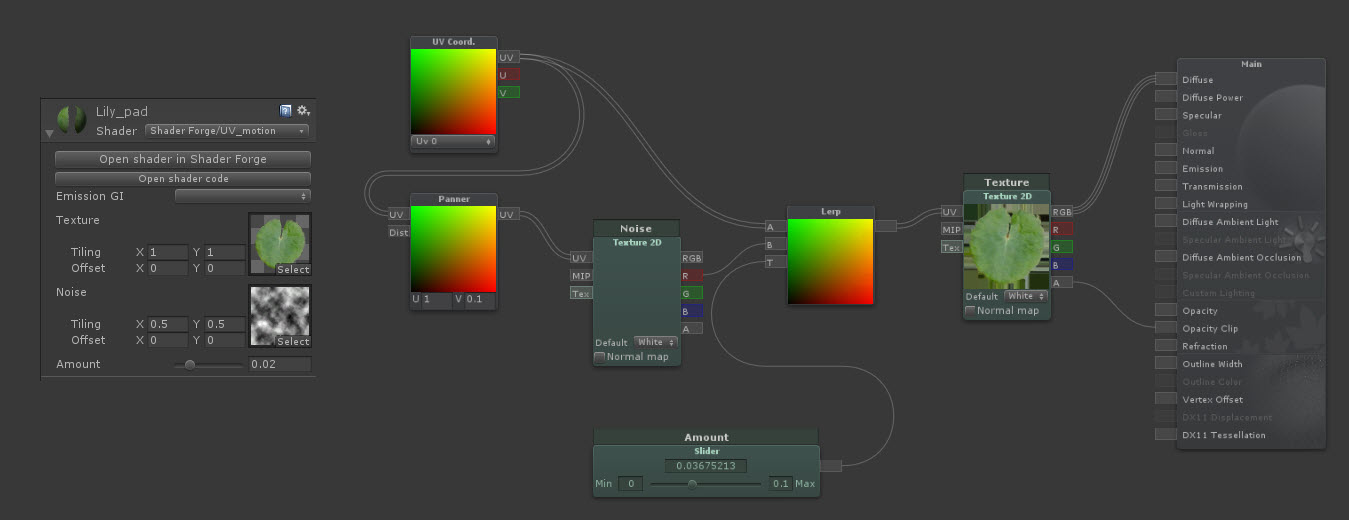
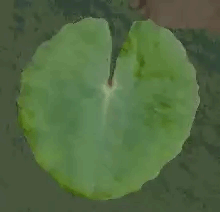
This shader was designed to ripple a lily pad similar to what would happen if it were undulating on the water surface. A tiled noise pattern is input by the user and given an amount scale which increases or decreases the effect. Built in Shader Forge for Unity.
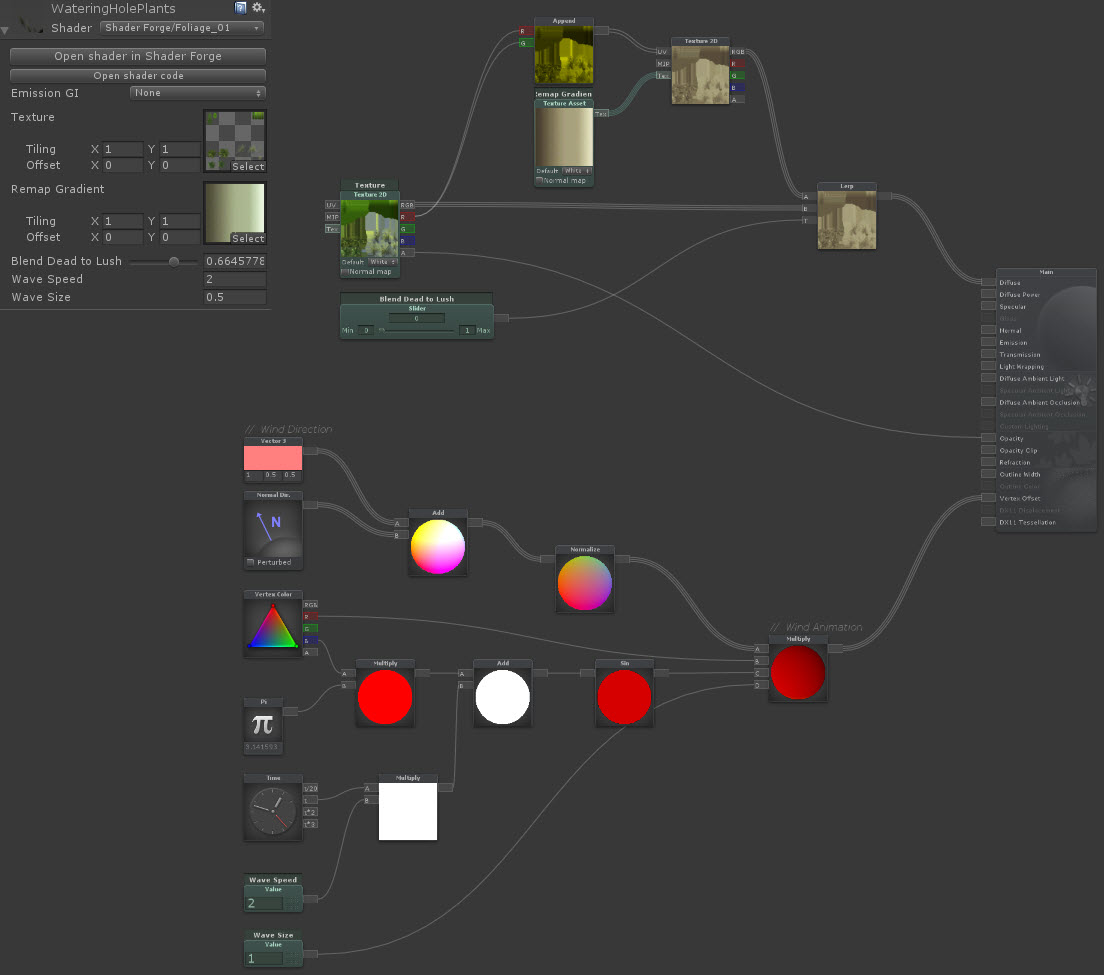
This shader was developed to allow for a dynamic foliage effect. When the food supply component of the game play was low, the foliage textures would ramp down to a desert/sparse level, when there was abundant food, then the foliage would show more lush vegetation on the terrain. It was used in combination with 3D objects to enhance the effect. It was built in Substance Designer and exported to Unity.